
 1094
1094
|
|
|
|
|
|
|
|
|
|
|
|
|
|
Before you begin
- Configure Import Settings for the provider and Source Name before uploading the file.
- Confirm the file is complete and includes required tables, such as exp_provider for most imports.
- Use a small test file before processing a large production import.
|
|
Upload an import file
1. Click Administrative Options.
2. Click Data Import and Export Features.
3. Click Provider Data Import.
4. Click New Import.
5. Click Choose File.
6. Select the import file.
7. Click Open.
8. Wait for the Upload Completed Successfully message.
9. Click Import File.
10. Click Refresh to update the status.
11. Click Back once the file is removed from the queue.
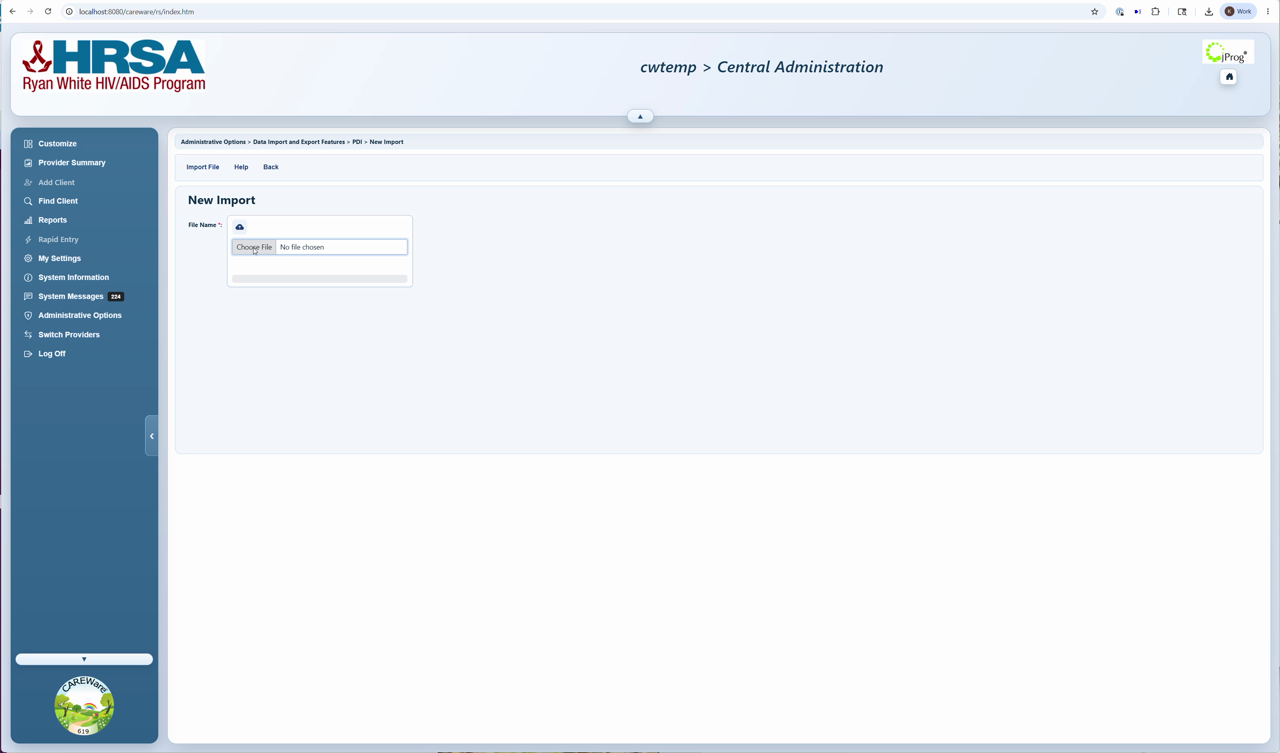
New Import page to browse to import file
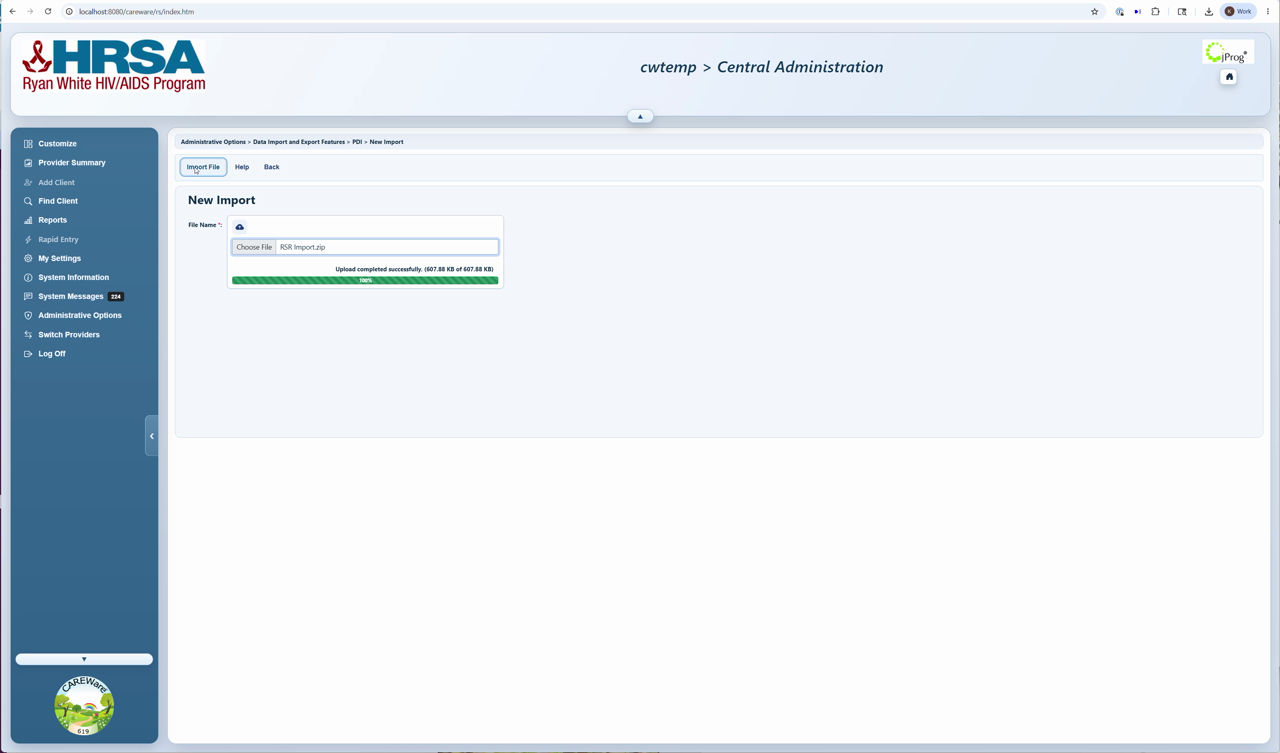
New Import page success message for uploaded file
Map an unmapped provider
If the provider name in the import file does not match a CAREWare provider, an unmapped provider option appears in the PDI menu.
1. Click Unmapped Providers.
2. Click the Incoming Provider.
3. Click Edit.
4. Click CAREWare Provider.
5. Select the correct provider.
6. Click Save.
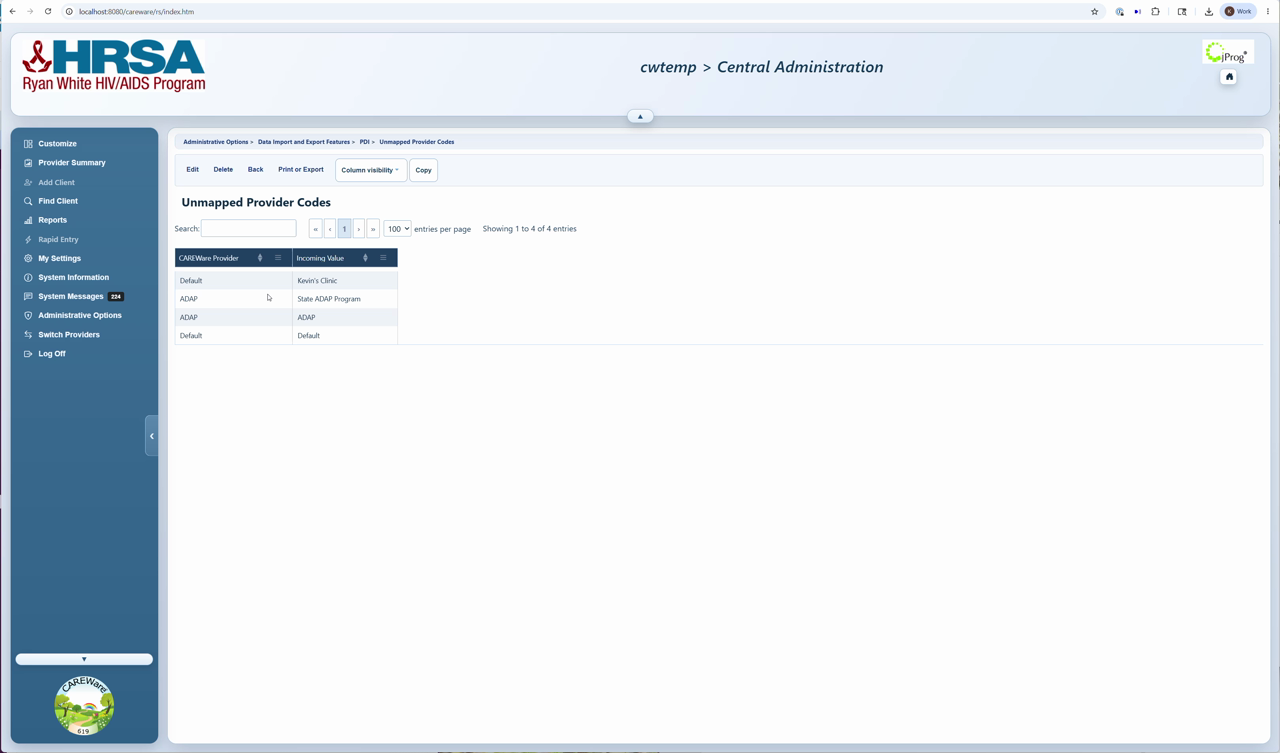
Unmapped Provider Codes screen for mapping providers
Import Queue options
|
|
|
|
|
|
|
|
|
|
|
|
|
|
|
|
|
|
|
|
How to confirm it worked
1. Open Import History.
2. Confirm the uploaded file appears with the expected provider, source, file name, and status.
3. Open Import Details to review errors, mappings, and records ready to process.
Troubleshooting and common questions
The file stays in the queue. What should I do?
Click Refresh and review the status. Verify the count changes or the table changes. If not, restart the CAREWare Business Tier service.
The provider is wrong. What should I check?
Confirm the provider name in exp_provider and the provider mapping in CAREWare.
The file was imported, however it is missing from the Import History
Check the Import History in Central Administration, look for unmapped providers. Make sure the exp_provider file was included in the zipped folder with the client level data. Make sure the correct provider name and import setting source name was listed in the exp_provider.csv file.
Related guides
|
|
|
|
|
|
|
|
|
|
|
|


