
 1616
1616
|
|
|
|
|
|
|
|
|
|
|
|
|
|
Before you begin
- Confirm the PDIFolder folder exists on the CAREWare server.
- Confirm the file folder path under Common Storage Values matches the PDIFolder location on the server.
- Confirm the provider and Source Name have accurate Import Settings.
- Test with a small import file before enabling automatic processing.
|
|
Configure the Provider Data Import folder
1. Log into Central Administration.
2. Click Administrative Options.
3. Click Server Management.
4. Click Common Storage Values.
5. Type PDIFolder in the Search field.
6. Set the folder path for imported data.
7. Confirm the AutomaticImports subfolder exists under that path on the CAREware server.
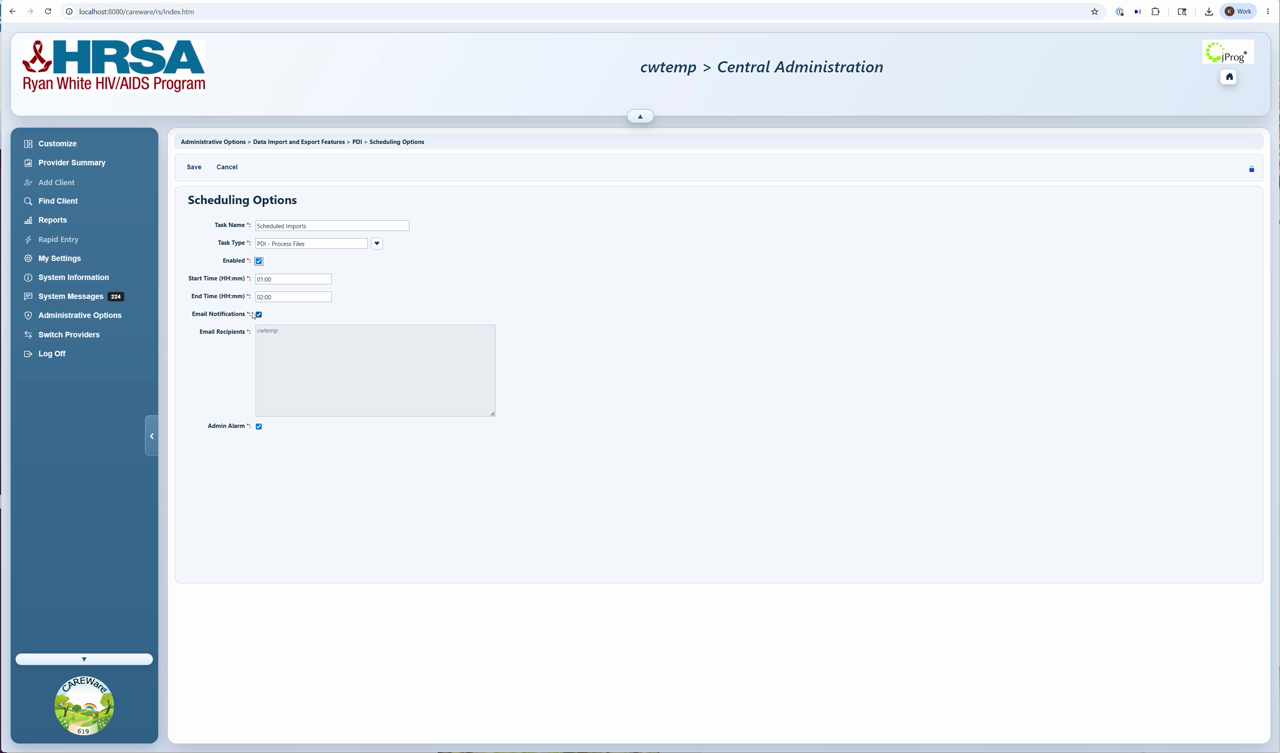
Create a scheduled task
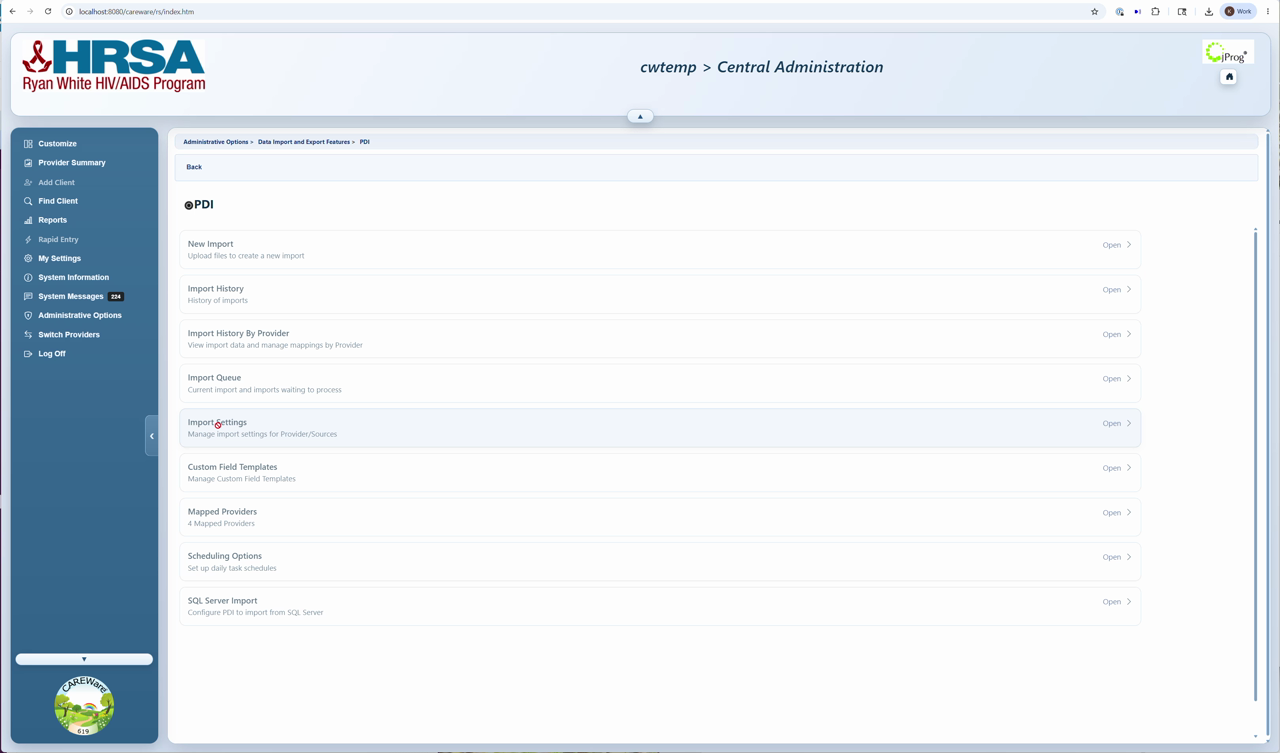
1. Click Administrative Options.
2. Click Data Import and Export Features.
3. Click Provider Data Import.
4. Click Scheduling Options.
5. Click Add.
6. Enter the Task Name.
7. Select PDI Process Files as the Task Type.
8. Check Enabled.
9. Enter a Start Time and End Time.
10. Click Save.
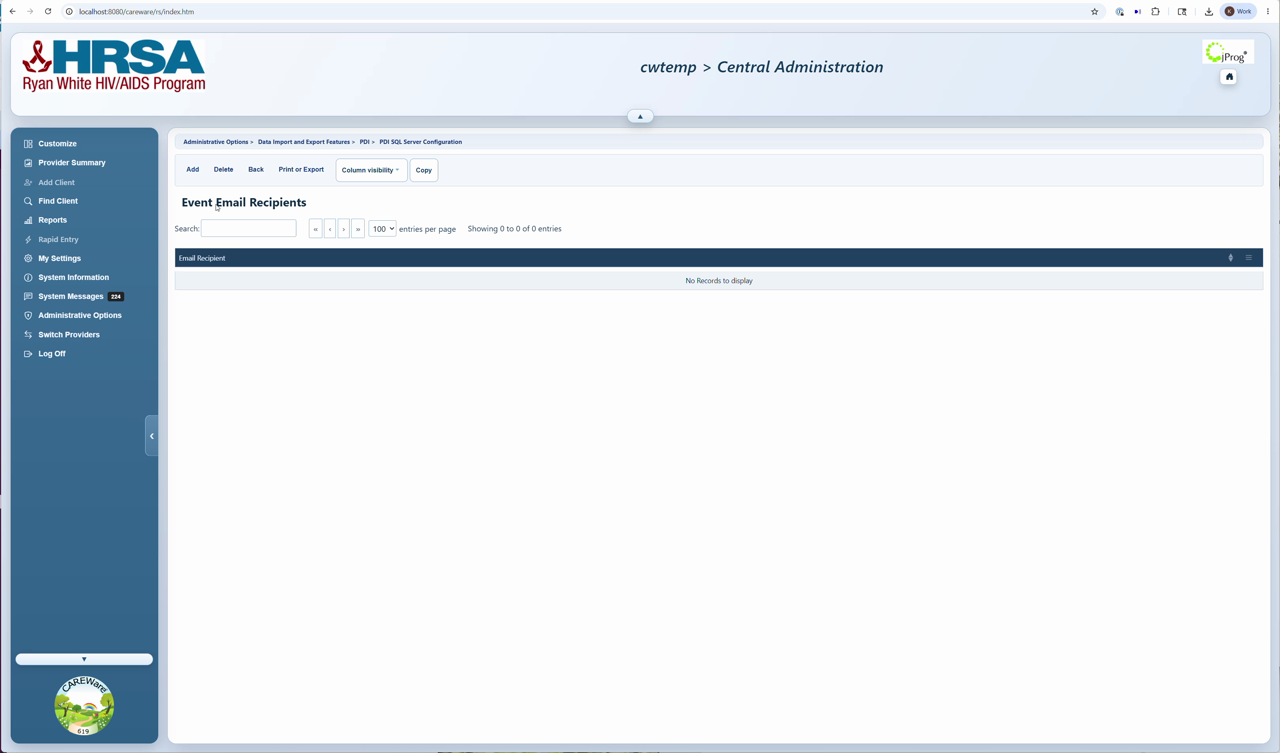
Add email notifications
1. Click Email Recipients.
2. Click Add.
3. Enter the Email Recipient name or address.
4. Click Save.
5. Select the task and click Edit.
6. Check Email Notifications.
7. Click Save.
Enable automatic processing for the import setting
1. Click Provider Data Import.
2. Click Import Settings.
3. Select the source to automate.
4. Click Edit.
5. Check Automatically Process Imports.
6. Click Save.
How to confirm it worked
1. Drop a test file into the AutomaticImports folder during the scheduled window.
2. Open Import History and confirm the file appears.
3. Confirm error-free records process automatically only when Automatically Process Imports is checked.
Troubleshooting and common questions
The file did not import automatically. What should I check?
Confirm the PDIFolder path, AutomaticImports subfolder, scheduled time window, and task Enabled checkbox. Check the System Log for errors during the time frame imports were scheduled to occur. Manually test uploading the file using New Import to see if there is an issue with the file.
The file imported but did not process. Why?
The Import Setting may not be configured for Automatically Process Imports, or the records may have errors or missing mappings.
Related guides
Import Settings | Import History | Provider Data Import | New Import |System Log


