


|
|
|
|
|
|
|
|
|
|
|
|
|
|
|
|
|
|
Quick path
|
|
Before you begin
Know the export date, provider, date span, or output file you want to verify. Export History is most useful when you compare it with the export configuration that generated the file.
Open Export History
1. Click Administrative Options.
2. Click Data Import and Export Features.
3. Click Provider Data Export.
4. Click Export History.
5. Use Search to find a provider, user, date, or other value in the list.
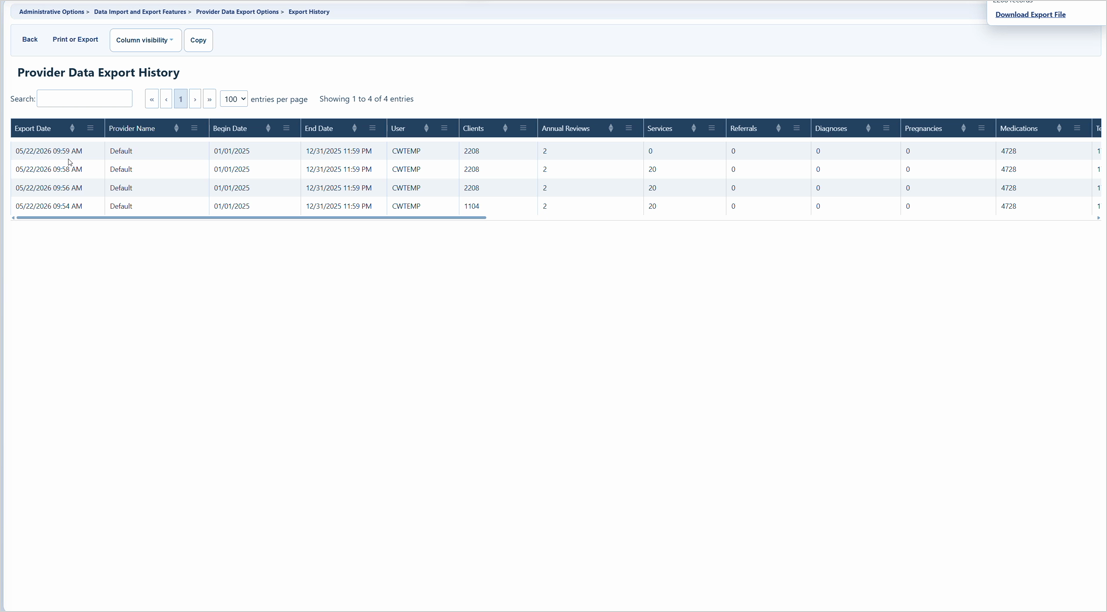
6. Review the row for Export Date, Provider Name, Begin Date, End Date, User, and client-level table counts.
 .
.
What the columns mean
- Export Date: Date and time the export ran.
- Provider Name: Provider the data was exported from. Multi-provider exports create one row per provider.
- Begin Date and End Date: Date span selected in the export settings.
- User: User who ran the export. System usually means the CAREWare Business Tier ran it, including scheduled exports.
- Client Level Table Counts: Count of exported client-level records in each selected table.
|
|
How to confirm it worked
1. Locate the export row by export date, provider, or user.
2. Compare Begin Date and End Date to the date span selected in the export.
3. Compare table counts to the selected tables, filters, and expected records.
4. If needed, open the downloaded export and spot-check the matching table files.
Troubleshooting and common questions
- Why does User show System? Scheduled exports and Business Tier processes are logged as System.
- Why are counts different than a report? Check filters, provider selection, date span, table critical dates, and Use Last Updated Date.
- Why do I see multiple rows for one export? A multi-provider export creates one row per provider.
Related guides
New Export | Scheduled Exports | Exporting Data Out of CAREWare


