


|
Purpose |
Create a dated, repeatable client subform, add custom controls, and manage user access. |
|
Who should do this |
CAREWare administrators, data managers, or designated support staff with access to Administrative Options, Custom Fields, and user permissions. |
|
Use this setup when |
You need a client-level grid that can store multiple dated entries using organization-defined controls. |
|
Main warning |
Confirm the correct provider or Central Administration domain before creating or activating a subform. Controls and permissions must be configured separately. |
|
Video walkthrough |
Quick path
|
Administrative Options > Custom Features > Custom Fields > Custom Subforms > select provider or domain > Add |
Before you begin
● Create each field definition in Custom Control Setup before adding it to the subform.
● Choose whether the subform should be restricted to users with one of the named Subform Permission A–E permissions.
● Confirm the provider or Central Administration domain in the top banner and use a test client when available.
|
Important Creating a control, activating it on the subform, activating the subform tab, and granting user permissions are separate tasks. Avoid repurposing a control after it contains data. |
Open Custom Subforms
Step 1. Click Administrative Options.
Step 2. Click Custom Features.
Step 3. Click Custom Fields.
Step 4. Click Custom Subforms.
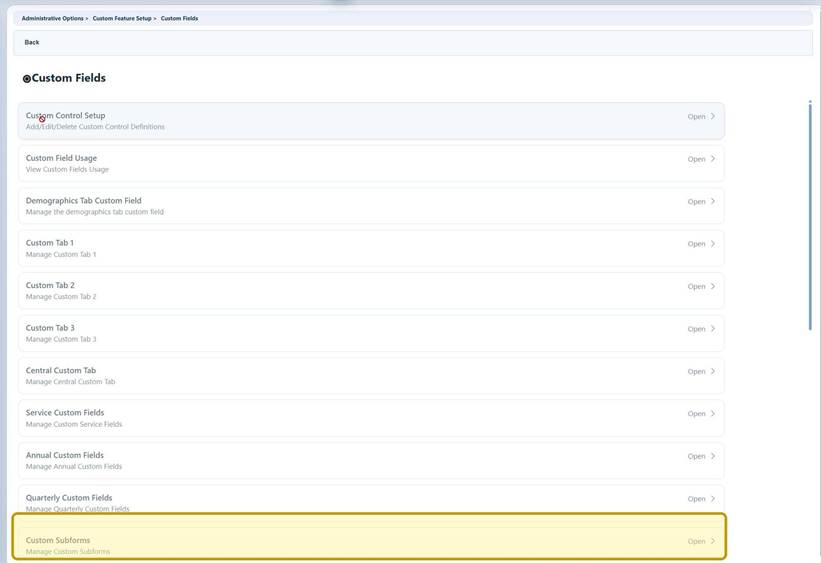
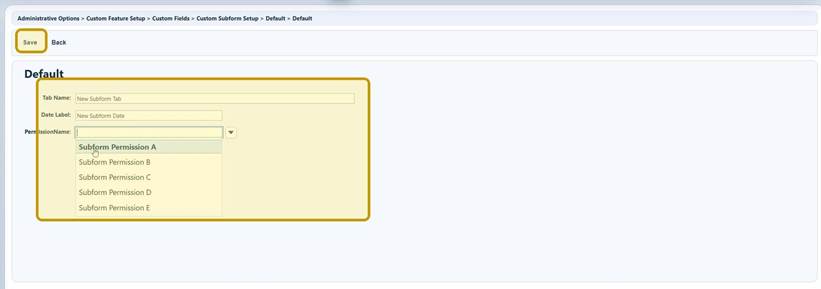
Create the subform tab
Step 5. Click Add.
Step 6. Enter a concise Tab Name.
Step 7. Enter the Date Label shown on each subform entry.
Step 8. Select a PermissionName when access must be limited to users with the matching Subform Permission A–E permission.
Step 9. Click Save.
|
Important Use a durable tab name and date label. Renaming a production subform can affect training, reports, forms, and staff workflows. |
Activate and manage the subform
Step 10. Select the new subform and click Activate.
Step 11. Keep the subform selected and click Manage.
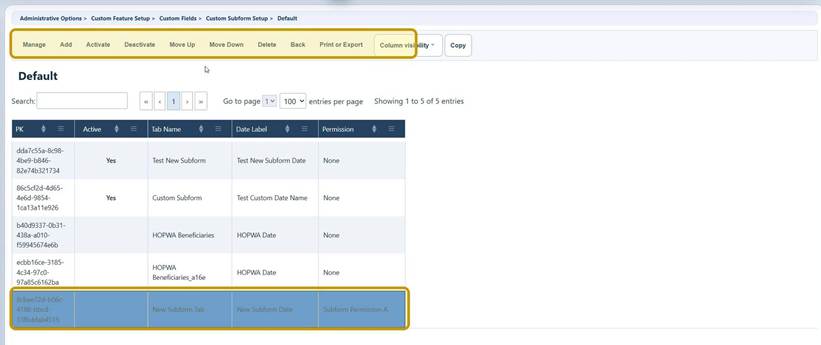
Step 12. Review Custom Subform Tab Properties.
Step 13. Click Manage custom controls.
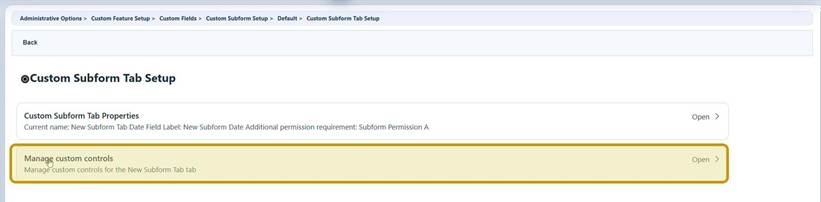
Add and order custom controls
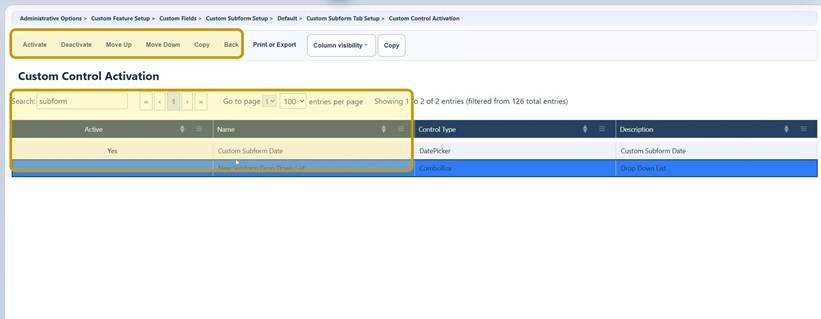
Step 14. Enter part of the control name or description in Search.
Step 15. Select the control and click Activate.
Step 16. Repeat until all required controls are active.
Step 17. Select an active control and click Move Up or Move Down to set the display order.
|
Important Required settings and default values follow the control wherever it is active. Require a value only when staff can consistently provide it. Required custom field values affect imports. |
|
Tip If a newly created or renamed control is missing, refresh the list using Resetting the Custom Field List before repeating the setup. |
Configure ComboBox values
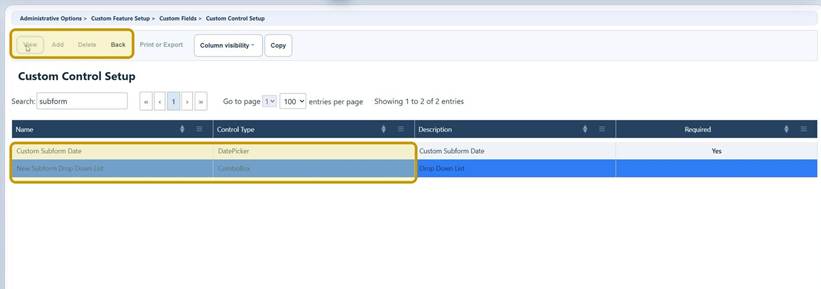
Step 18. Return to Custom Fields and click Custom Control Setup.
Step 19. Select the ComboBox control and click View.
Step 20. Click Edit Values and select the applicable provider or domain.
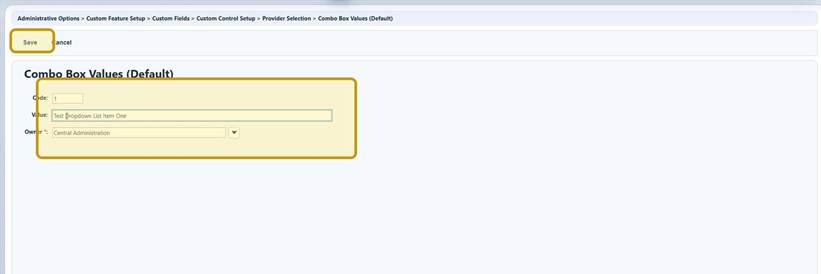
Step 21. Click Add.
Step 22. Enter a stable Code and the displayed Value.
Step 23. Click Save and repeat for each choice.
Step 24. Activate the values that users should be able to select.
|
Important When a ComboBox value has been used in client data, deactivate it instead of deleting it. Deactivation preserves historical records. |
Enter subform data for a client
Step 25. Switch to the applicable provider and open Find Client.
Step 26. Open a test client record.
Step 27. Select the custom subform from the client menu.
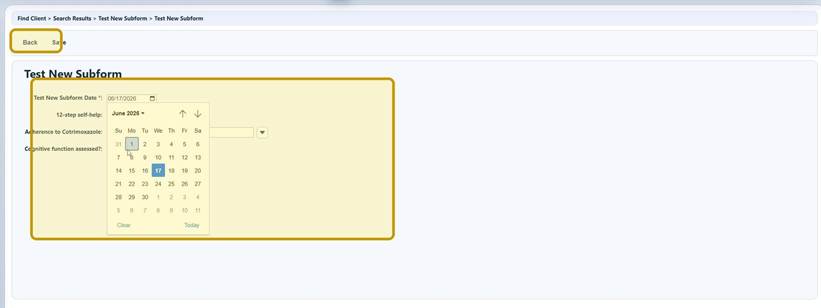
Step 28. Click Add.
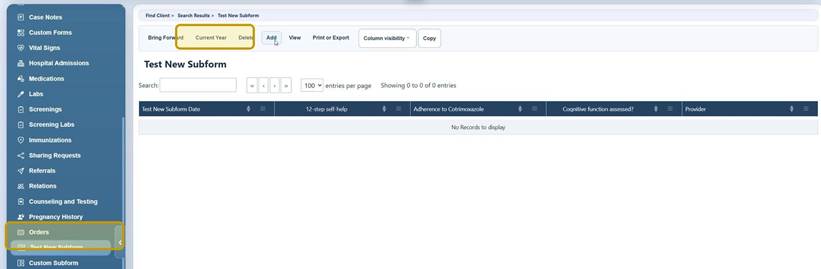
Step 29. Enter the required date and complete the active fields.
Step 30. Click Save.
|
Tip Use Bring Forward only after confirming which values should carry into the new dated entry. Review copied values before saving. |
Grant user access
Step 31. Click Administrative Options.
Step 32. Click Provider User Manager.
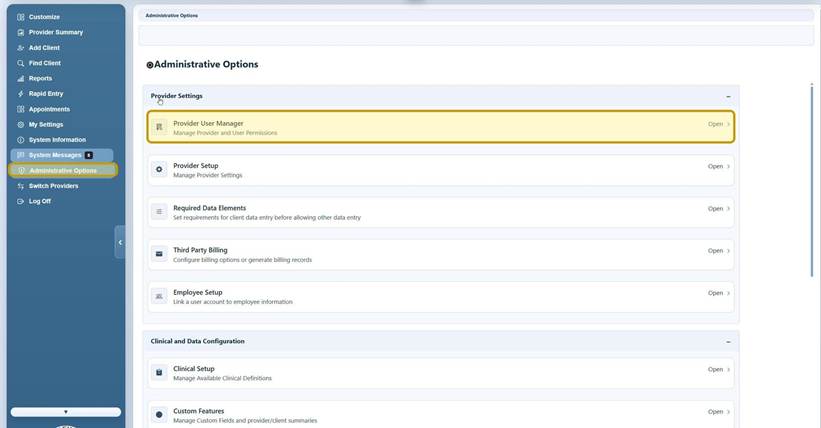
Step 33. Open Manage Users and select the user.
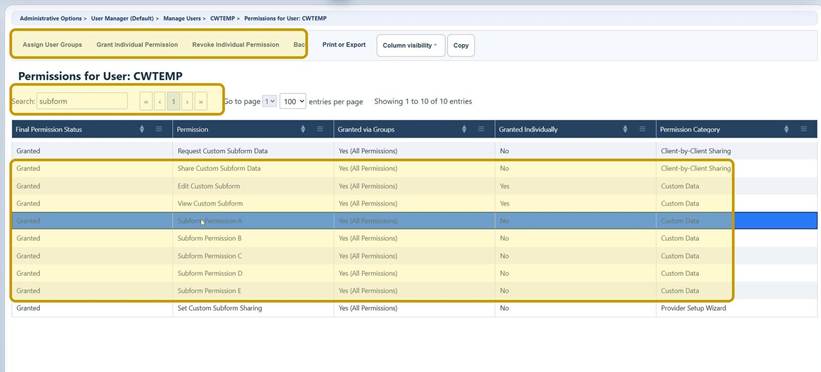
Step 34. Click Manage Permissions.
Step 35. Search for subform.
Step 36. Grant View Custom Subform and Edit Custom Subform as needed.
Step 37. Grant the exact Subform Permission A–E selected in the subform properties.
|
Important A user may receive permissions through a user group or an individual grant. Test the final permission combination with each applicable role. |
Custom Subform setup buttons
|
Button |
What it does |
When to use it |
|
Add |
Creates a new subform tab definition. |
Use when a new repeatable client grid is needed. |
|
Manage |
Opens the selected subform properties and control activation. |
Use to review settings or add controls. |
|
Activate |
Makes the selected subform or control available. |
Use after setup and testing are complete. |
|
Deactivate |
Stops new use without deleting the definition. |
Use when retiring a subform or control while preserving history. |
|
Move Up / Move Down |
Changes the order of active controls. |
Use to place fields in a logical workflow order. |
|
Edit Values |
Opens the choice list for a saved ComboBox. |
Use to add, activate, or deactivate drop-down values. |
|
Bring Forward |
Creates a new dated entry using values from an earlier entry. |
Use only when copied values are still accurate. |
Permission checklist
● View Custom Subform: permits the user to open subform data.
● Edit Custom Subform: permits the user to add or change entries.
● Subform Permission A–E: must match the optional PermissionName selected for the subform.
● Field-level Toggle Edit by Permission settings can further restrict editing.
How to confirm the setup
● The custom subform appears in the selected provider’s client menu.
● The Add screen uses the intended date label and displays controls in the correct order.
● Required fields, default values, length limits, and ComboBox choices behave as intended.
● A saved entry appears in the subform grid with the correct date and values.
● Users with the required permissions can view or edit the subform; users without them cannot.
Helpful data-quality tips
|
Topic |
Recommended practice |
|
Control type |
Use ComboBox for standardized reporting values, DatePicker for dates, Memo for narrative text, and TextBox for short text. |
|
Required data |
Require only information that is consistently available and necessary for the workflow. |
|
Default values |
Use defaults sparingly; a blank value is safer than an unverified value. |
|
Field names |
Choose names that remain understandable in reports, exports, templates, and training materials. |
|
Change control |
Review reports, imports, exports, forms, and existing data before changing a production control. |
|
Testing |
Use a non-production client and verify each applicable permission role before release. |
Troubleshooting and common questions
Why is the subform missing from the client menu?
Confirm that the subform is active in the correct provider, the user has View Custom Subform, and the user has the matching Subform Permission A–E when one is assigned.
Why is a custom control not listed during activation?
Confirm the control exists in the correct provider or Central Administration domain. Then refresh the list using Resetting the Custom Field List.
Why does a ComboBox have no choices?
Open the control in Custom Control Setup, click Edit Values, add the Code and Value entries, and activate the intended values.
Why can the user view but not edit the subform?
Grant Edit Custom Subform and review any field-level Toggle Edit by Permission setting. Check group-based and individual permissions.
Why am I changing the wrong setup?
Check the top banner and confirm whether you are in Central Administration or a provider before making changes.
Related CAREWare guides and resources
|
Resource |
How it helps |
|
Create and maintain the field definitions used by a custom subform. |
|
|
Add, edit, activate, and deactivate ComboBox choices. |
|
|
Refresh lists when a new or renamed control is not displayed. |
|
|
Review where custom controls are active before changing them. |
|
|
Select users and manage their provider-level permissions. |
|
|
Assign permissions through groups for consistent access. |
|
|
Use custom fields in CAREWare import and export templates. |


