


|
Purpose |
Activate existing custom controls for use on Pregnancy History records and collect provider-specific pregnancy information. |
|
Who should do this |
CAREWare administrators, data managers, or designated support staff with access to Administrative Options and Custom Fields. |
|
Use this setup when |
A custom field must be activated, deactivated, or reordered on the Pregnancy History entry screen for a provider. |
|
Main warning |
Confirm the correct provider before making changes. Required fields, defaults, or repurposed controls can affect data entry, reports, imports, and historical records. |
|
Video walkthrough |
Quick path
|
Administrative Options > Custom Features > Custom Fields > Pregnancy Custom Fields > select provider > Manage Selected Provider |
Before you begin
• Create the custom control definition in Custom Control Setup before activating it for Pregnancy History.
• Confirm whether you are working in Central Administration or inside a provider, and verify the provider in the top banner.
• Decide what the field must collect and choose the simplest control type that represents the data.
• Use a test or non-production client and pregnancy record when available.
|
Important Creating a custom control definition and activating it for Pregnancy History are separate tasks. Custom pregnancy fields supplement the built-in Pregnancy History fields; they do not replace them. |
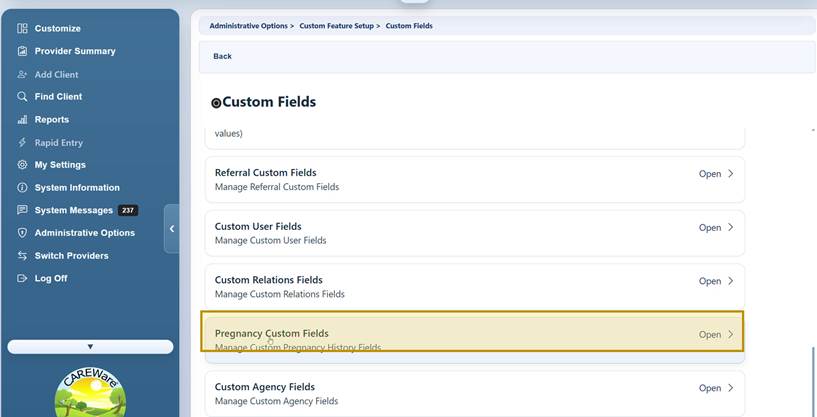
Open Pregnancy Custom Fields
Step 1. Click Administrative Options.
Step 2. Click Custom Features.
Step 3. Click Custom Fields.
Step 4. Click Pregnancy Custom Fields.
Select the provider
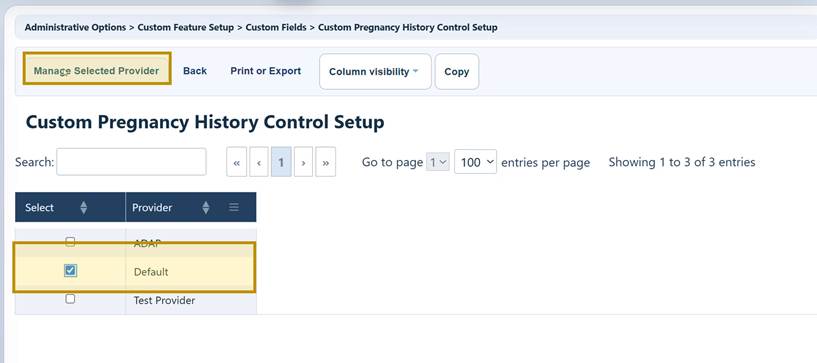
Step 5. In Central Administration, select the provider and click Manage Selected Provider. If you are already inside one provider, skip this step.
|
Important Changes made here apply to the selected provider. Verify the provider before activating, deactivating, copying, or reordering fields. |
Activate and order a custom field
Step 6. Enter part of the control name or description in Search.
Step 7. Select the control, then click Activate.
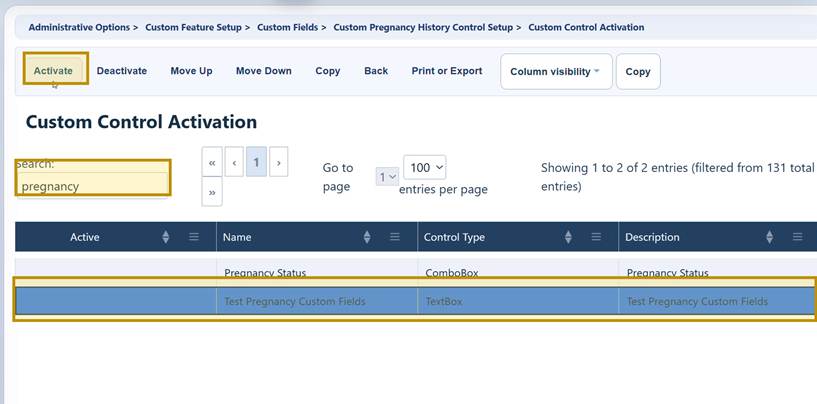
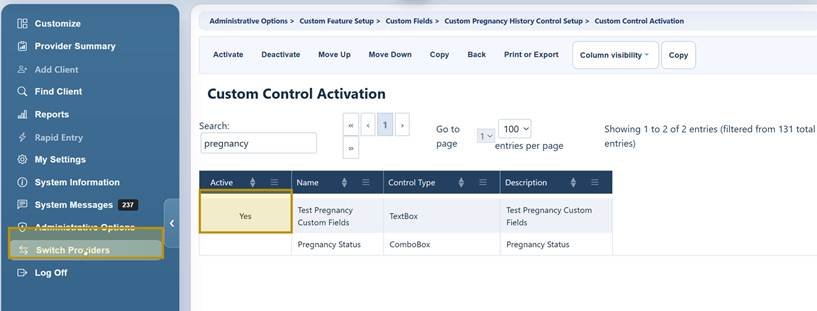
Step 8. Confirm that Active displays Yes for the control.
Step 9. Select an active control and click Move Up or Move Down until it appears in the preferred order.
Deactivate a field
Step 10. Select the active control and click Deactivate.
|
Important Deactivating a custom pregnancy field stops displaying it for new or edited Pregnancy History records. It does not delete the control definition or remove historical values already stored. |
Open a client record
Step 11. Click Switch Providers and open the provider where the field was activated.
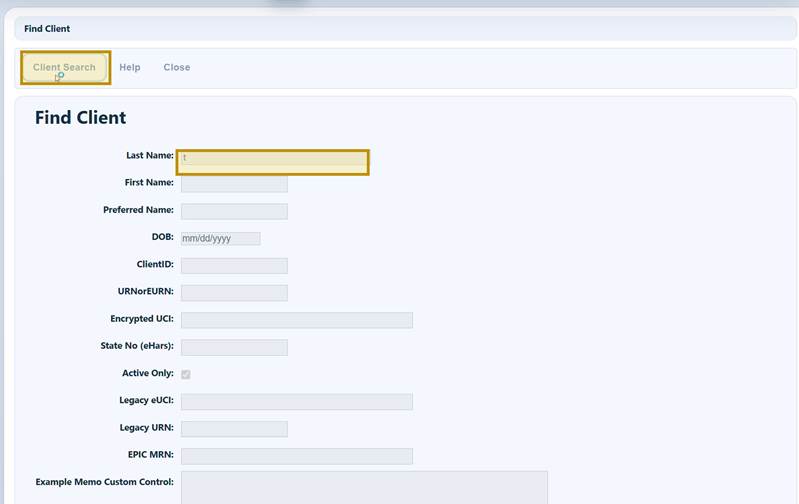
Step 12. Click Find Client.
Step 13. Enter a search term, then click Client Search.
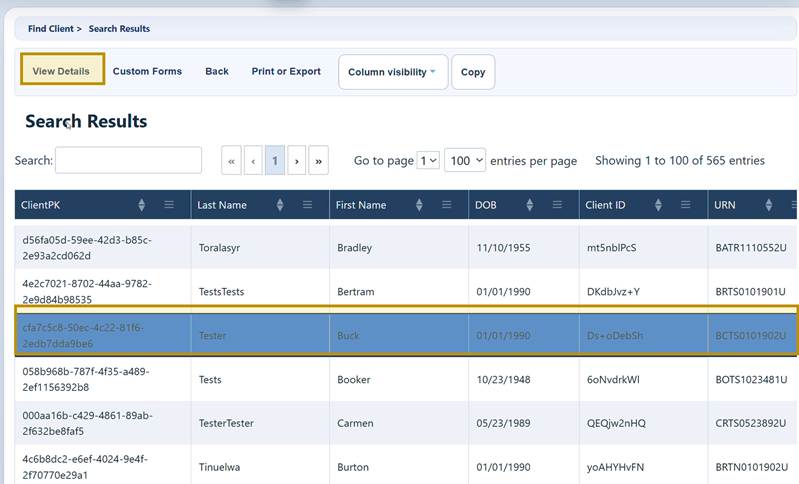
Step 14. Select the client, then click View Details.
Open Pregnancy History
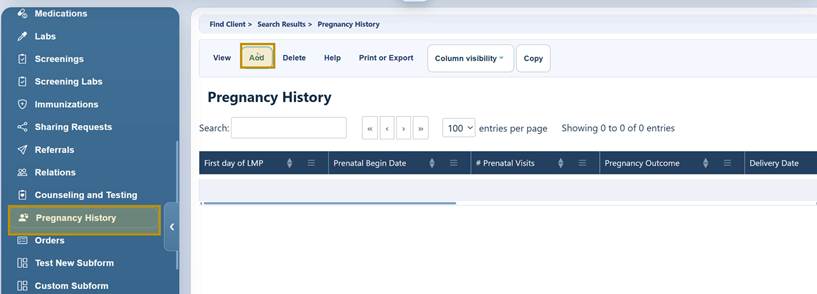
Step 15. In the client record, click Pregnancy History.
Step 16. Click Add.
|
Important Confirm that the correct client and provider are displayed before entering pregnancy information. Pregnancy History records can contain sensitive clinical information. |
Enter and save the pregnancy record
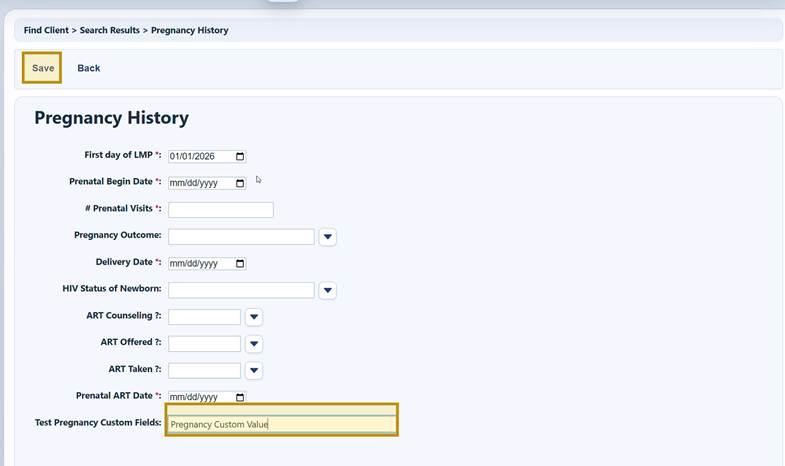
Step 17. Complete the applicable built-in Pregnancy History fields. Required fields are marked with an asterisk.
Step 18. Enter or select the value in the custom pregnancy field.
Step 19. Click Save.
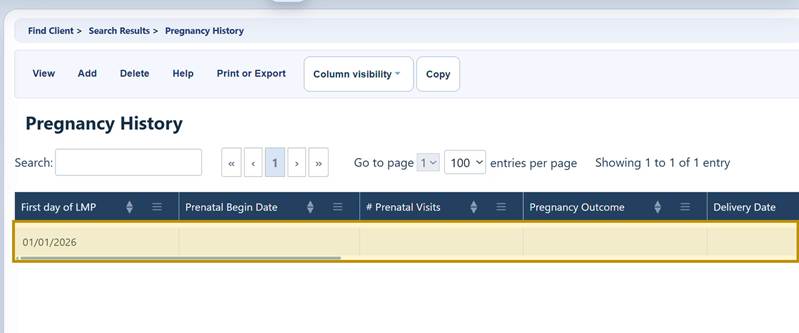
Step 20. Confirm that the pregnancy record appears in the Pregnancy History list.
|
Tip The list may show only built-in Pregnancy History columns. Select the record and click View to confirm that the custom value was retained. |
Custom Control Activation buttons
|
Button |
What it does |
When to use it |
|
Manage Selected Provider |
Opens the activation list for the selected provider. |
Use after selecting a provider in Central Administration. |
|
Activate |
Adds the selected control to the provider’s Pregnancy History entry screen. |
Use when the field should be collected on pregnancy records. |
|
Deactivate |
Removes the field from new or edited entries without deleting its definition. |
Use when the field should no longer be displayed. |
|
Move Up / Move Down |
Changes the field’s position on the Pregnancy History entry screen. |
Use to place related fields in a logical order. |
|
Copy |
Copies selected activation settings where supported. |
Use only after confirming the destination provider and local change process. |
|
Print or Export |
Opens options to print or export the grid. |
Use for review, documentation, or change control. |
|
Column visibility |
Shows or hides grid columns. |
Use to simplify the list or display optional details. |
Pregnancy History buttons
|
Button |
What it does |
|
View |
Opens the selected Pregnancy History record. |
|
Add |
Starts a new Pregnancy History record. |
|
Delete |
Removes the selected Pregnancy History record. Follow local correction and retention procedures. |
|
Save |
Saves the new or edited record. |
|
Back |
Returns without saving additional changes. |
Helpful data-quality tips
• Use a DatePicker for pregnancy-related dates and a ComboBox for standardized choices that must be counted or reported consistently.
• Use a TextBox for short values and a Memo for longer narrative information.
• Do not duplicate built-in fields such as First day of LMP, Prenatal Begin Date, Pregnancy Outcome, Delivery Date, or Prenatal ART Date.
• Use default values sparingly; a blank value is safer than an incorrect value accepted without review.
• If a ComboBox choice has been used, deactivate it instead of deleting it so historical records remain understandable.
• Use Toggle Edit by Permission for sensitive or controlled pregnancy information and test each applicable role.
|
Important Required fields and default values affect every Pregnancy History entry where the control is active and may affect imports or templates that include the control. Require a value only when staff can consistently obtain it. |
|
Tip After a control contains production data, do not change its meaning. Create a new control when the business meaning changes, then deactivate the old control after reviewing reports, imports, exports, and staff workflows. |
Troubleshooting and common questions
Why is the control not listed?
Confirm that the control definition exists under Custom Control Setup. Refresh the list using Resetting the Custom Field List when appropriate.
Why does an active field not appear on the Pregnancy History entry screen?
Confirm the correct provider, verify that Active displays Yes, refresh the client record, and reopen the Pregnancy History entry screen.
Why does Save fail?
Complete all required built-in and custom fields, verify the control’s length or allowed values, and review any validation message displayed beside the field.
Why can’t a user edit the field?
Review Toggle Edit by Permission and the user’s permission group. Test each applicable role before production use.
Why does a ComboBox have no choices?
Open the control in Custom Control Setup, add or activate values under Edit Values, and confirm that the intended values are active.
Why is the custom value not shown in the list?
The Pregnancy History grid may show only built-in columns. Select the record and click View to verify the custom value. The columns displayed in the Pregnancy History list can be managed by clicking Column Visibility.
Related CAREWare guides and resources
|
Resource |
How it helps |
|
Create and maintain control definitions before activating them for Pregnancy History. |
|
|
Add, edit, activate, or deactivate ComboBox choices. |
|
|
Review where custom controls are active and how they are used. |
|
|
Refresh custom field lists when a new or changed control is not displayed. |
|
|
Use custom fields in CAREWare import and export templates. |
|
|
Open the CAREWare Custom Fields section for related setup guides. |
|
|
Update user permissions by group. |


