
 992
992
|
|
|
Purpose |
Prepare CAREWare so PDI can automatically add missing NDC codes and activation dates to the ADAP formulary. |
|
Who should do this |
CAREWare administrators and ADAP data managers who maintain medication and drug payment imports. |
|
Use this guide when you need to |
Set the ADAP medication file path, file name, and setup data import option before uploading an ADAP drug import. |
|
Main warning |
Use the folder path without a file name for ADAP_Drug_Files and the file name without a path for PDI_ADAPAvailableMedFileName. |
|
Quick path Central Administration > Administrative Options > Server Management > Common Storage Values > search ADAP >Edit ADAP_Drug_Files. Then Provider Data Import > Import Settings > Automatically Import Setup Data. |
Before you begin
Download the newest ADAPdrugsimport.xml file here and save it to the designated folder.
Confirm the CAREWare server can access the designated folder.
Decide whether to update settings in CAREWare Common Storage Values or in the CW Admin Utility.
|
Important Before uploading the ADAP drug import, check Automatically Import Setup Data in Import Settings so metadata setup data can be imported. |
Set ADAP values in Common Storage Values
1. Log into Central Administration.
2. Click Administrative Options.
3. Click Server Management.
4. Click Common Storage Values.
5. Type ADAP in the search field.
6. Click ADAP_Drug_Files or PDI_ADAPAvailableMedFileName.
7. Click View.
8. Click Edit.
9. Set the file folder path in that setting.
10. Click Save.
11. Click PDI_ADAPAvailableMedFileName.
12. Click View.
13. Click Edit.
14. Set the ADAP Medications File Name in that setting.
15. Click Save.
Set ADAP values in the CW Admin Utility
1. Go to C:\Program Files\CAREWare Business Tier.
2. Right-click CW Admin.
3. Click Run as Administrator.
4. Click Stop Server.
5. Click Common Storage Settings.
6. Sort the first column alphabetically.
7. Find ADAP_Drug_Files.
8. Enter the folder path that contains the ADAPdrugsimport.xml file.
9. Find PDI_ADAPAvailableMedFileName.
10. Enter the ADAP medication import file name only.
11. Click another cell to save.
12. Click Server Settings.
13. Click Start Server.
Enable setup data import
1. Click Administrative Options.
2. Click Data Import and Export Features.
3. Click Provider Data Import.
4. Click Import Settings.
5. Select the ADAP import setting.
6. Click Edit.
7. Check Automatically Import Setup Data.
8. Click Save.
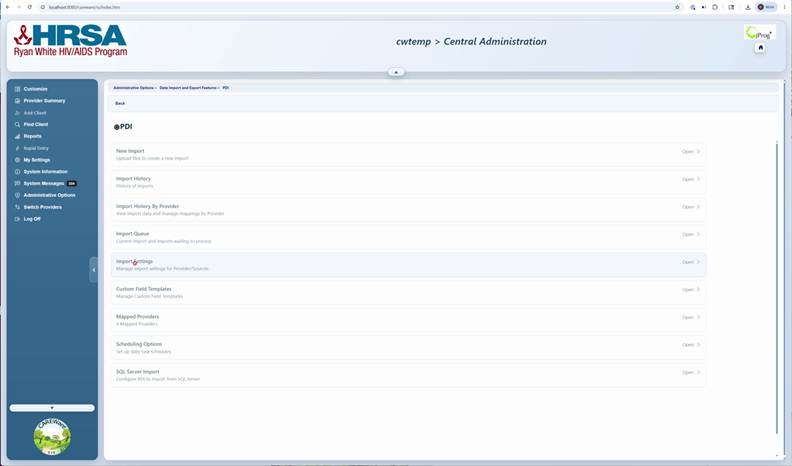
Import Settings edit screen showing setup data options from the source video.
How to confirm it worked
- The ADAP_Drug_Files value points to the folder containing the ADAP medication file.
- The PDI_ADAPAvailableMedFileName value contains only the file name.
- Automatically Import Setup Data is checked for the ADAP import setting before the import is uploaded.
- Verified new NDCs are included in imported Drug Payment records for clients.
Troubleshooting and common questions
NDCs were not added. What should I check?
Confirm the file path, file name, server access to the folder, and Automatically Import Setup Data setting.
Should the path include the XML file name?
No. ADAP_Drug_Files is the path only; PDI_ADAPAvailableMedFileName is the file name only.
Related guides
|
Guide |
Description |
|
Learn how to configure import settings for your data. |
|
|
Understand the Provider Data Import feature and its capabilities. |
|
|
Instructions for effectively managing National Drug Codes. |
|
|
Learn how to create and configure a new import process. |


