


|
|
|
|
|
|
|
|
|
|
|
|
|
|
|
Quick path
Administrative Options > Custom Features > Workflow Designer
Before you begin
• Confirm the provider and environment where the workflow will be tested.
• Confirm the responsible user group has Edit Workflow Designs plus permission to open and save every page the workflow will use.
• Plan the trigger, page sequence, saved-record events, user messages, and the group that will test the workflow.
• Ensure all data elements for the workflow are active for the provider including subservices and funding sources for contracts, tests and medications in clinical setup, and any necessary permissions to access data entry fields relevant to complete the workflow.
• Use a test client or test record and keep the first assignment limited until the complete and resume paths are verified.
|
|
Open Workflow Designer and create a draft
Step 1. Click Administrative Options.
Step 2. Open Custom Features, then click Workflow Designer.
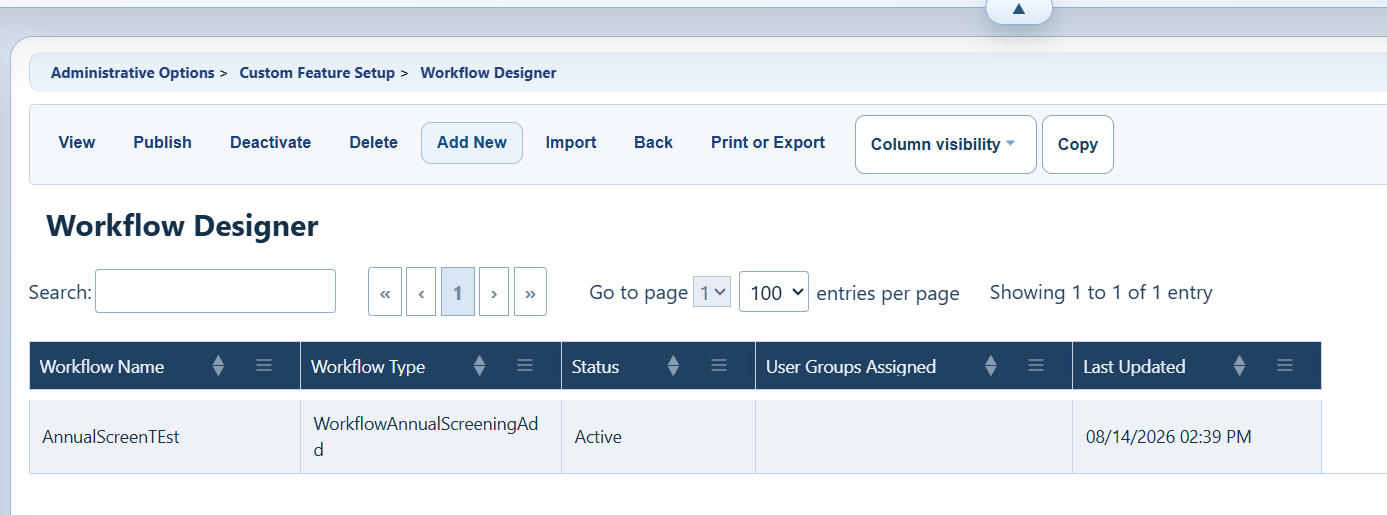
Step 3. Click Add New.
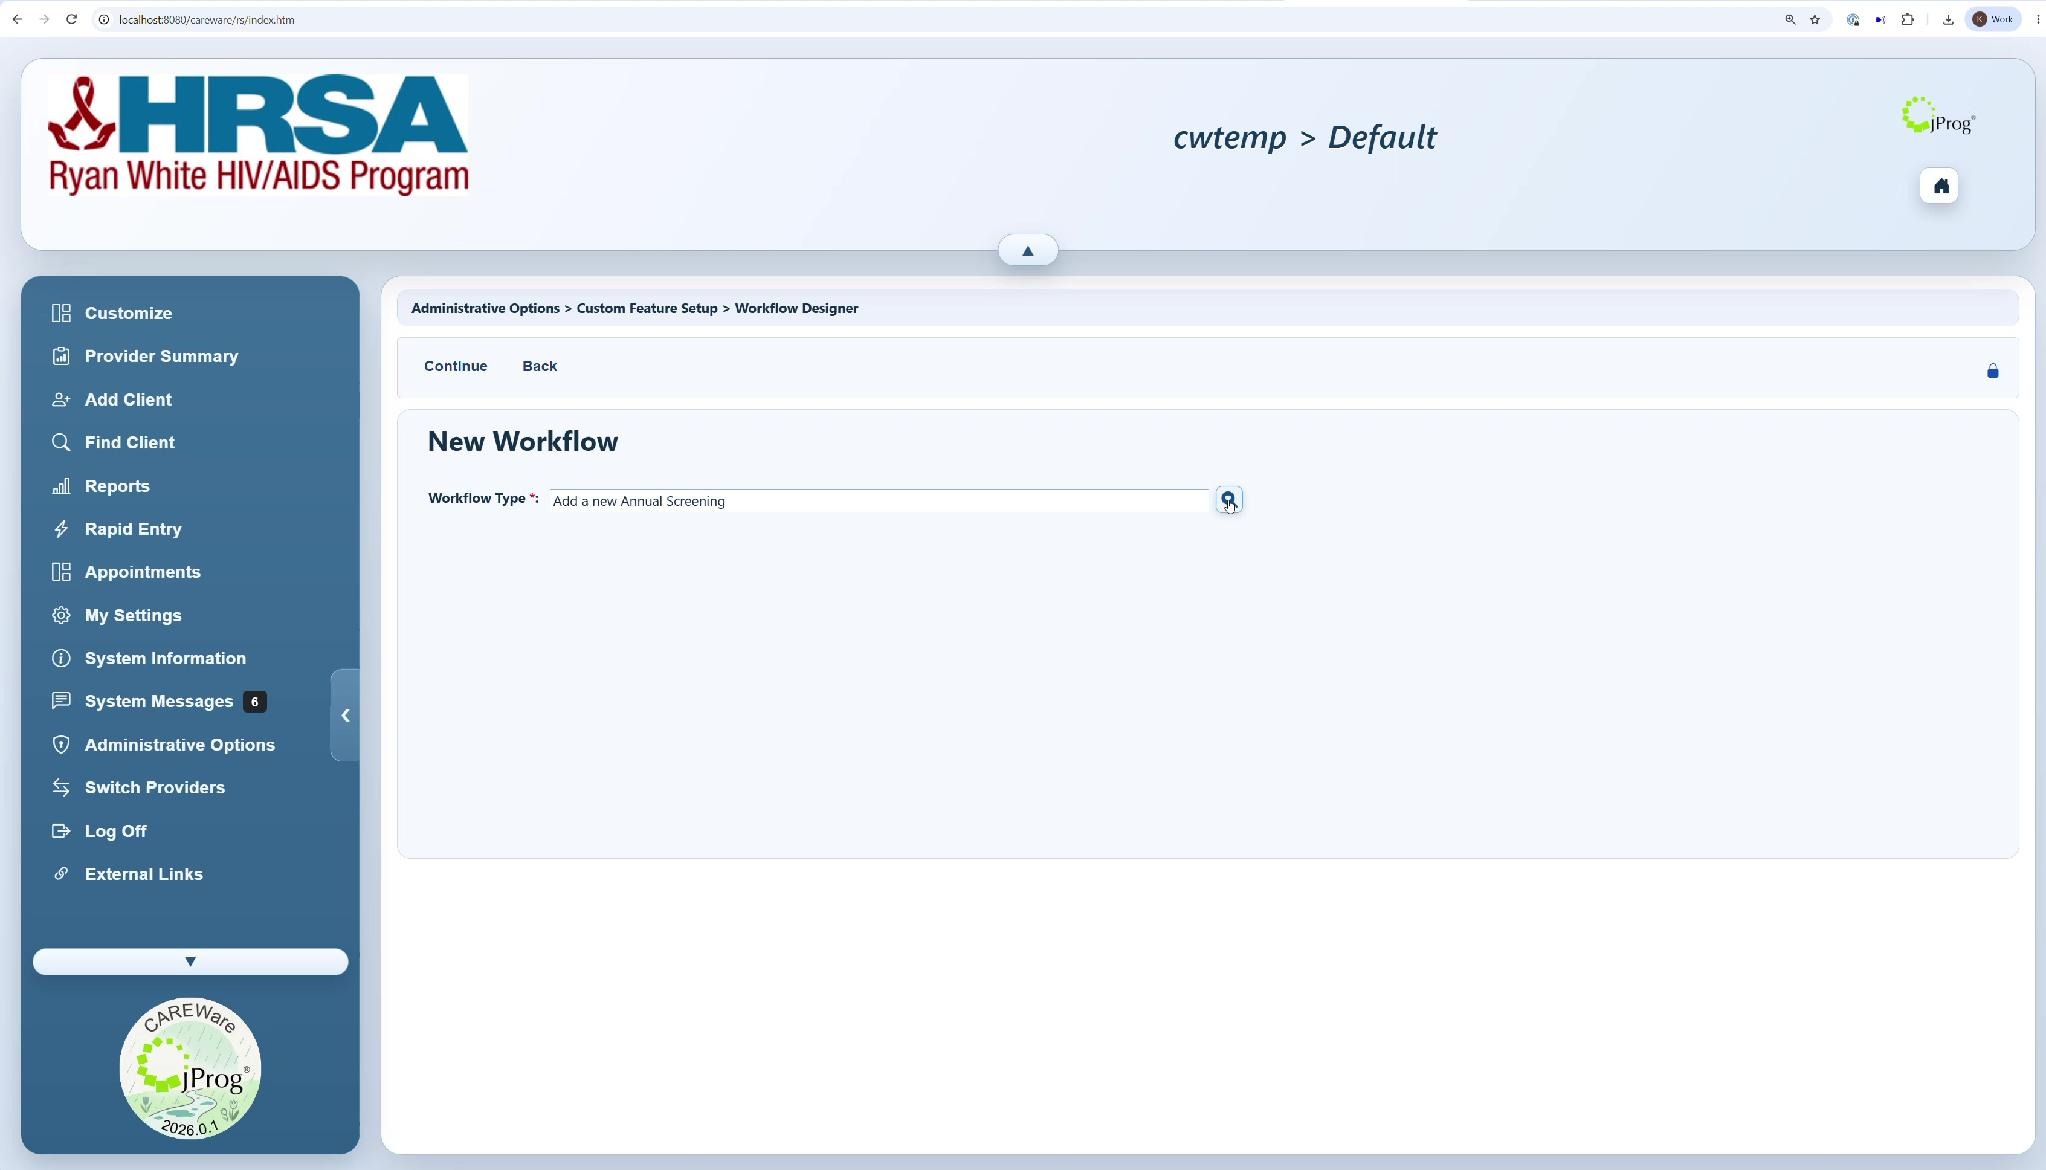
Step 4. Select the Workflow Type. The selected type determines the trigger shown on the canvas, then click Continue.
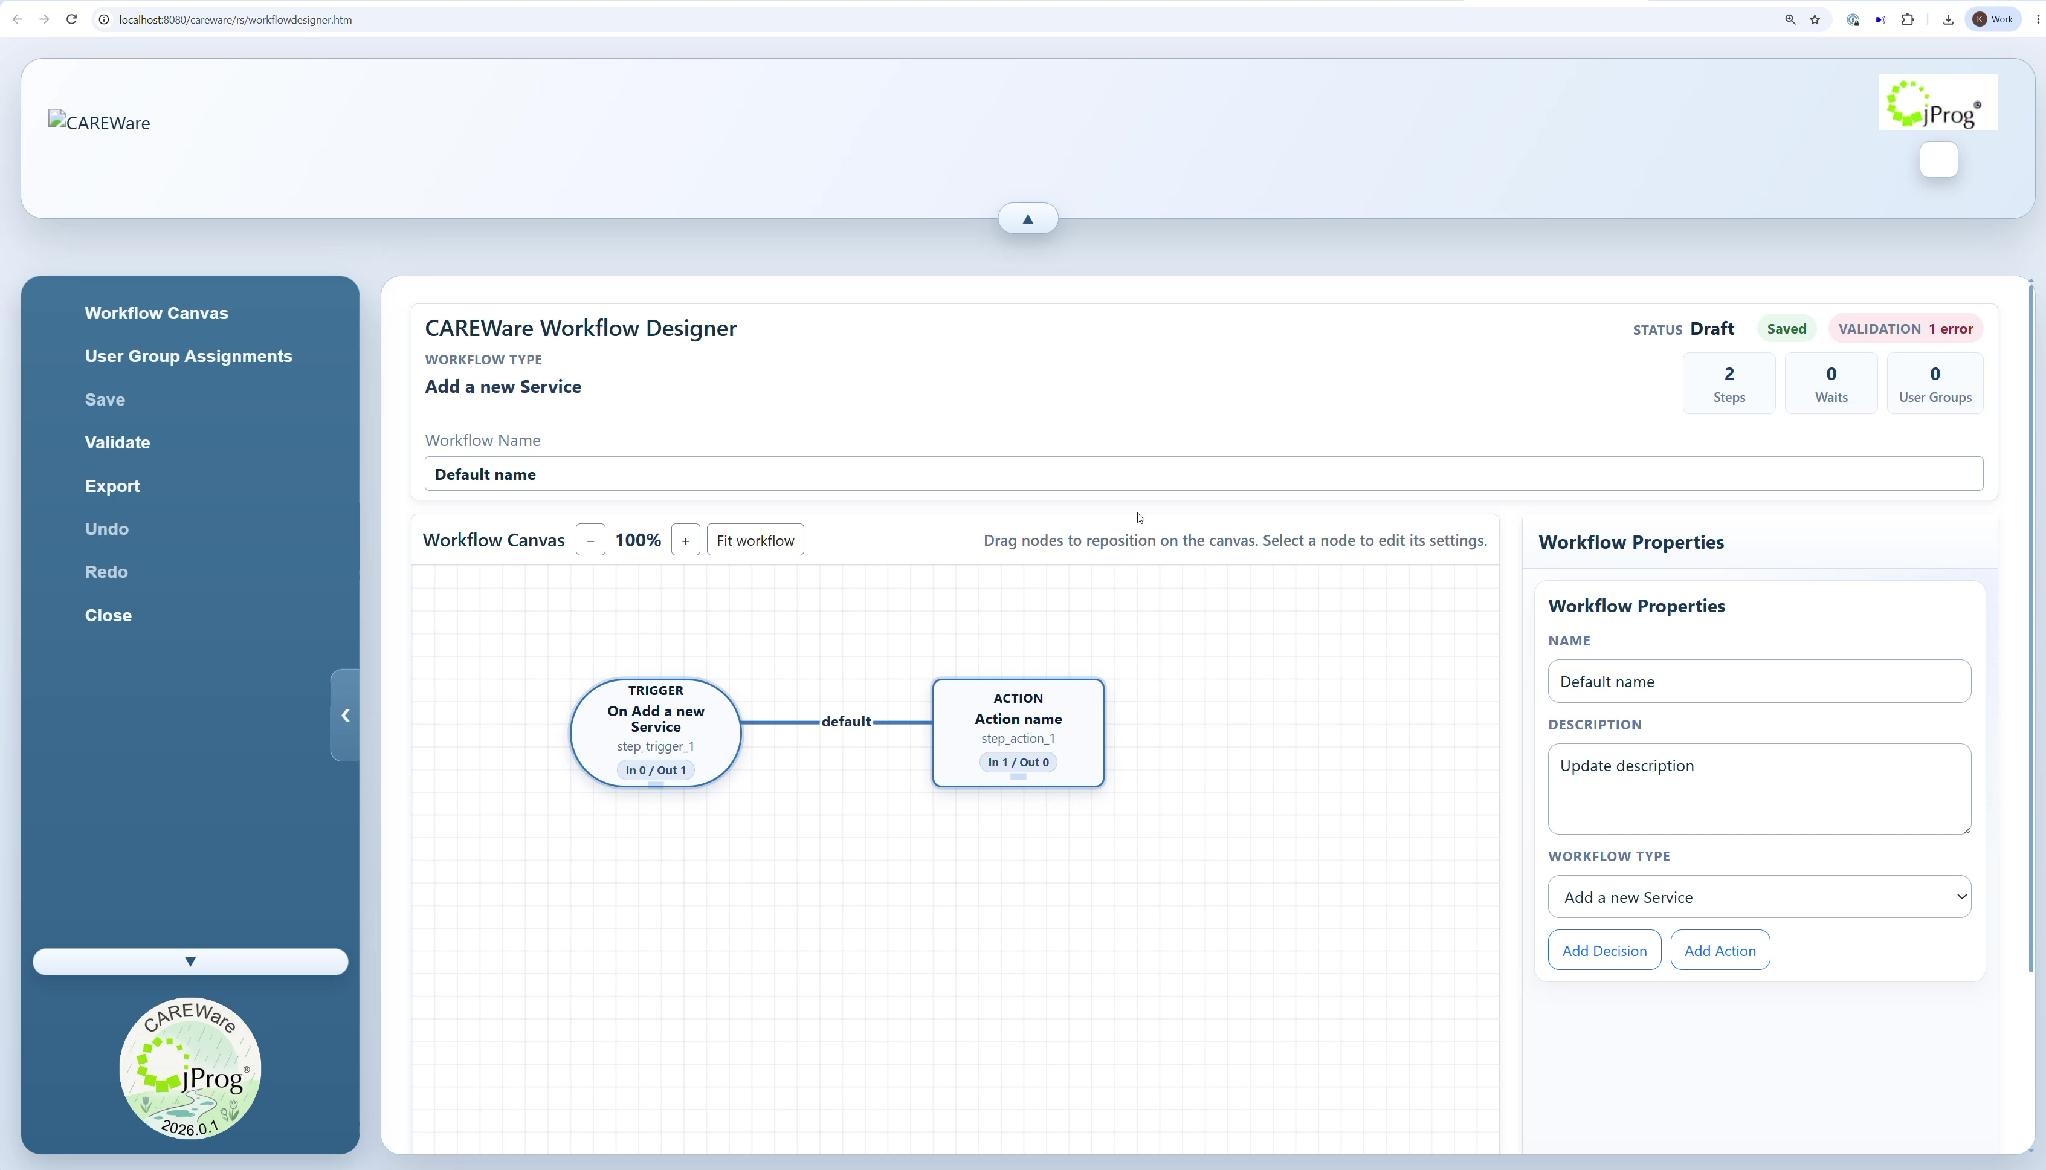
Step 5. Enter a clear Workflow Name that describes the trigger and purpose.
|
|
Understand the Workflow Canvas
The canvas begins with a trigger node. Select a node to edit its settings in the right panel. Use Add Action, Add Wait for User Input, or Add Decision where those buttons are available. Nodes can be repositioned on the canvas without changing the workflow logic.
Core step types
|
|
|
|
|
|
|
|
|
|
|
|
|
|
|
|
|
|
Configure an Action
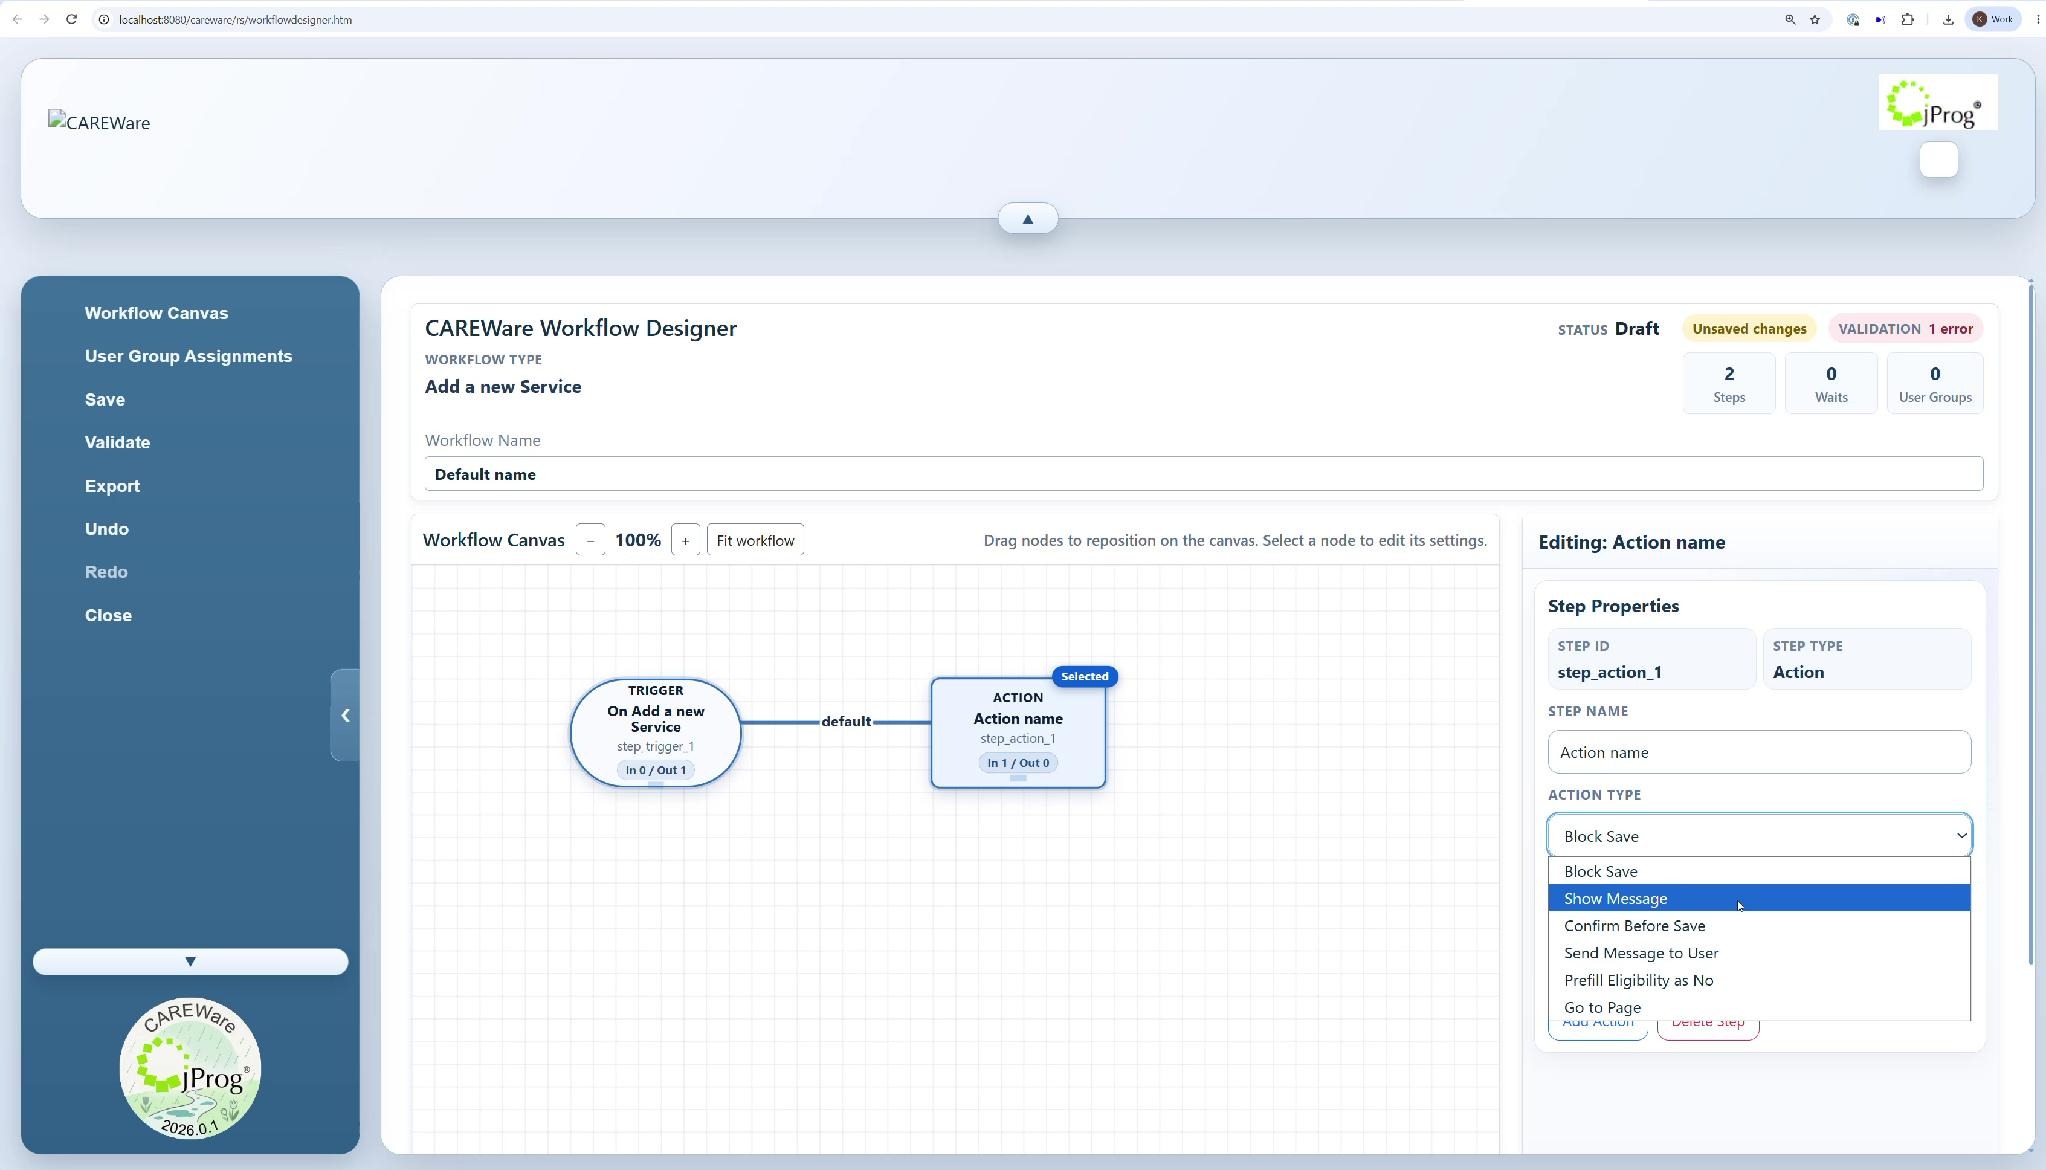
Step 6. Select an Action node. Enter a descriptive Step Name.
Step 7. Open Action Type and choose the behavior required for that point in the workflow.
Action configurations available
|
|
|
|
|
|
|
|
|
|
|
|
|
|
|
|
|
|
|
|
Go to Page and Wait for User Input
Step 8. For Action Type, select Go to Page.
Step 9. Select the Target Page.
Step 10. Select the Destination, such as Add Screen when the workflow should open a new-record form.
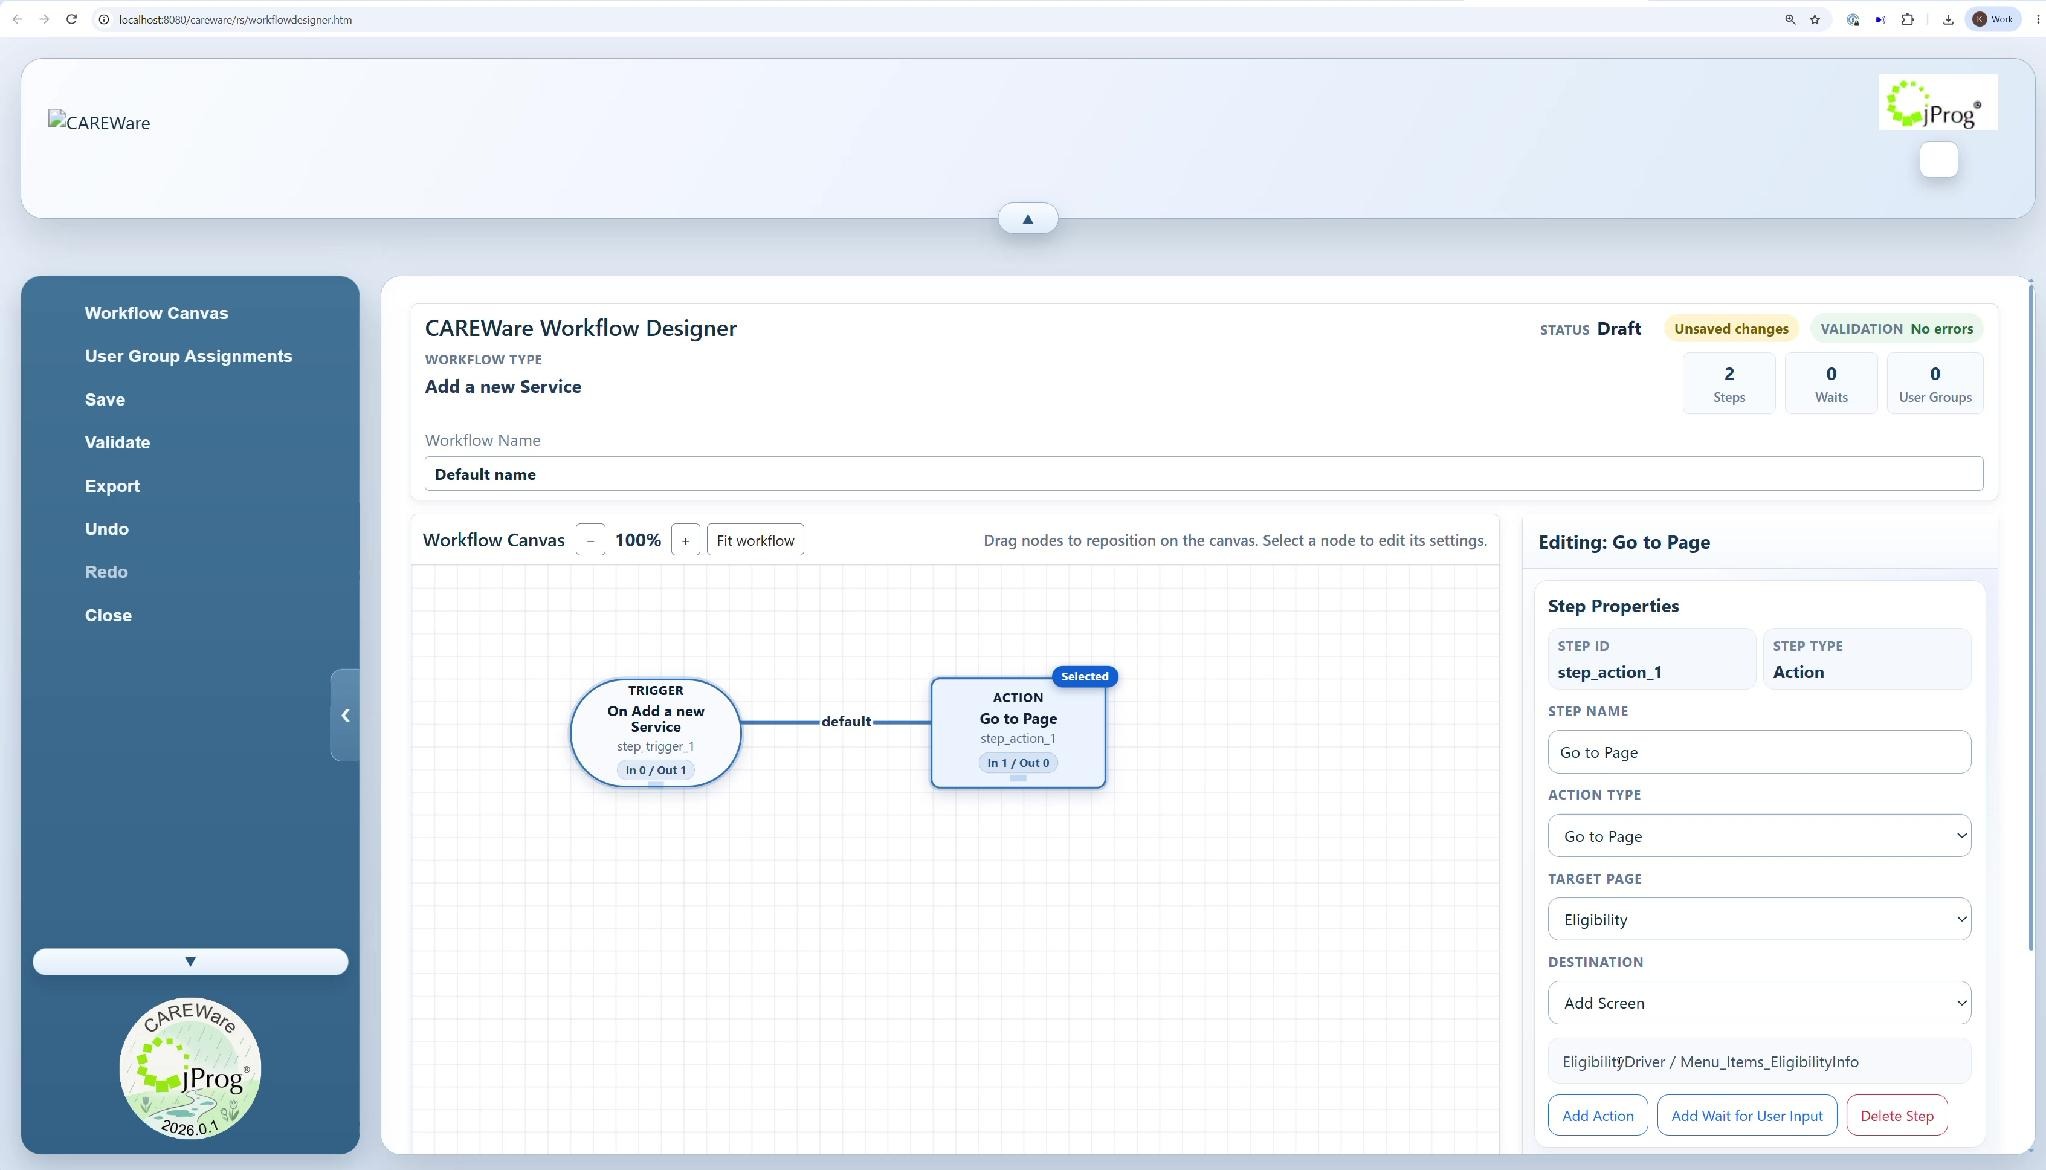
Step 11. Click Add Wait for User Input.
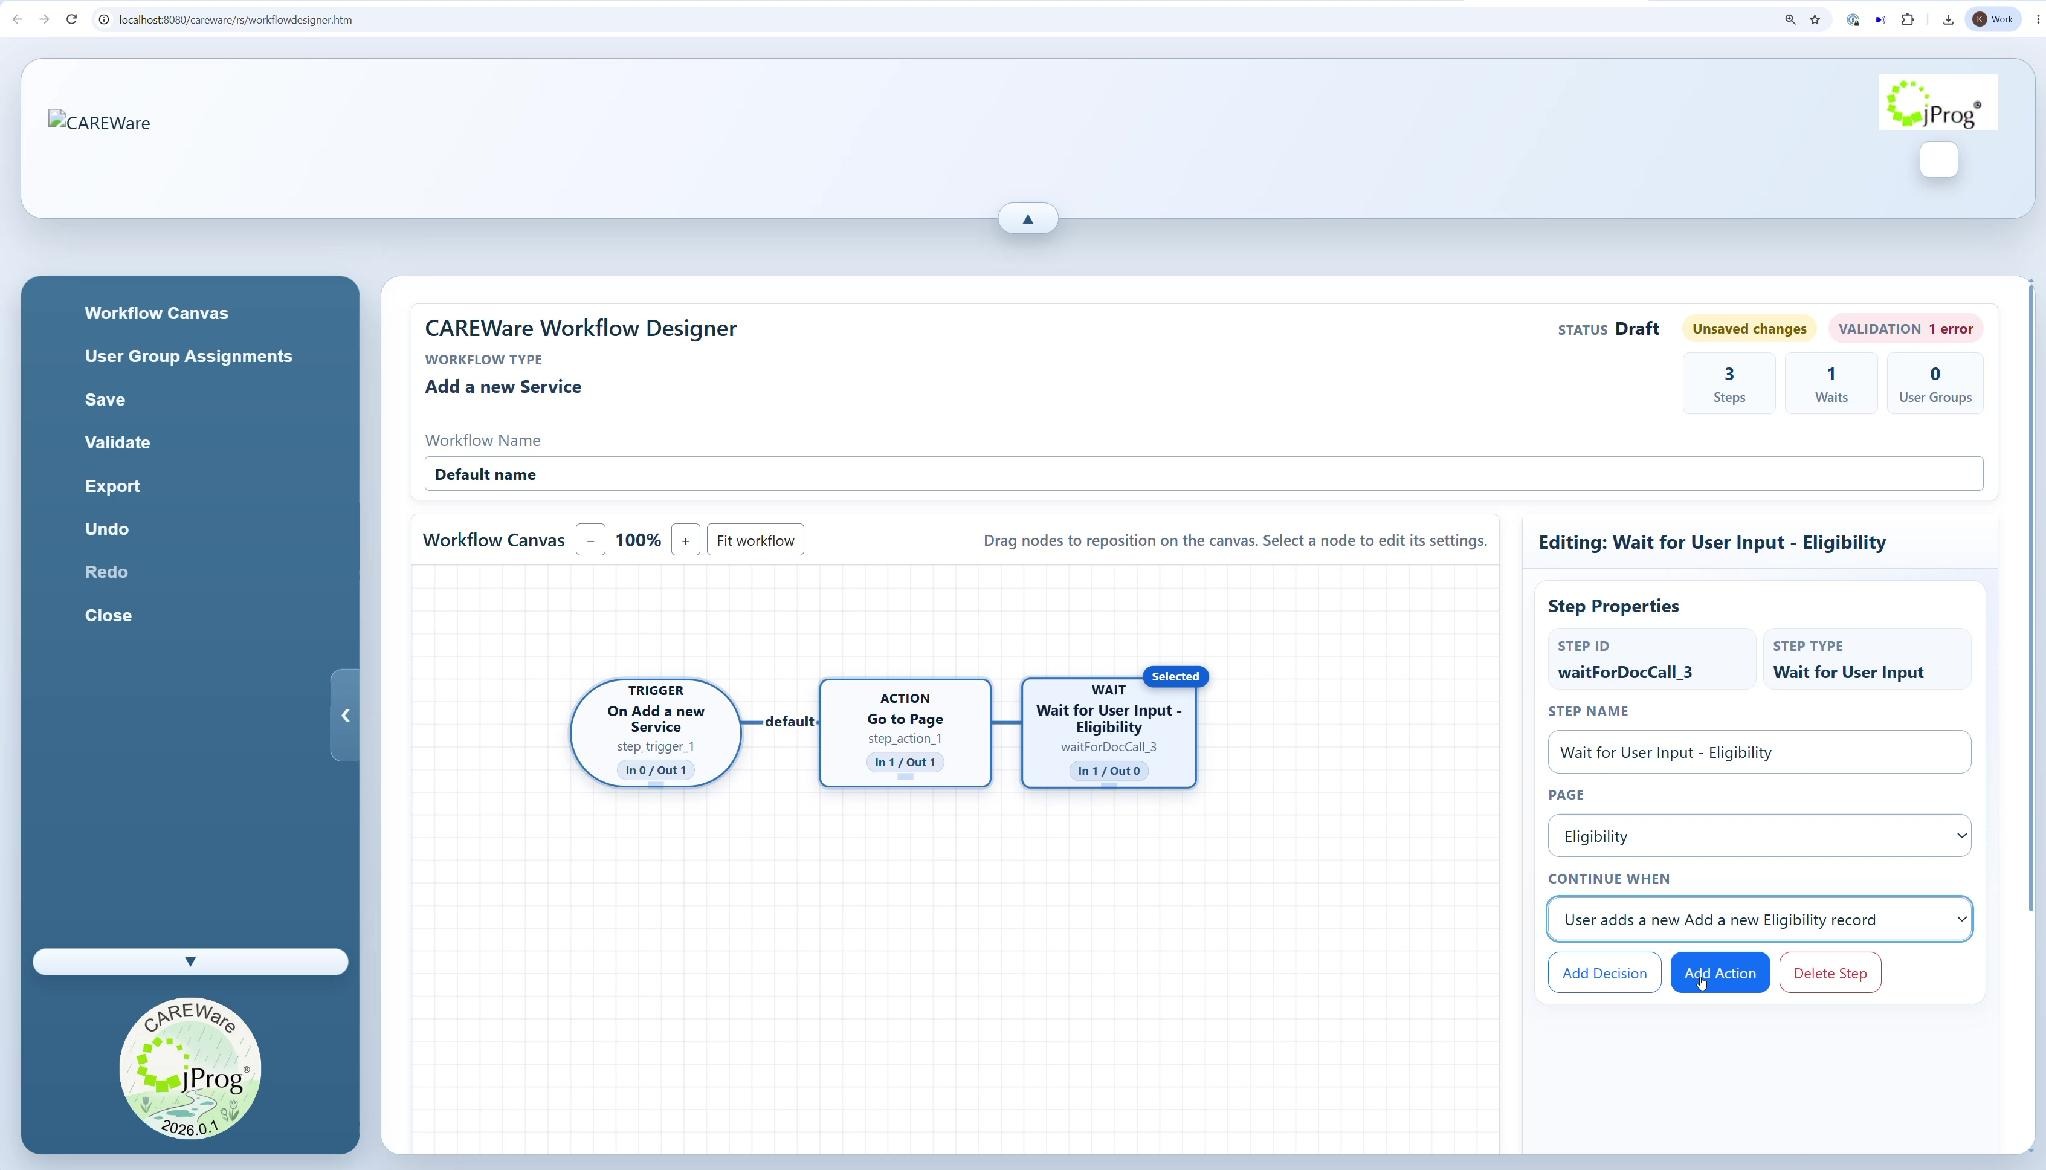
Step 12. Select the Page.
Step 13. Select Continue When to define the saved-record event that advances the workflow.
Configure continue events and repeatable page patterns
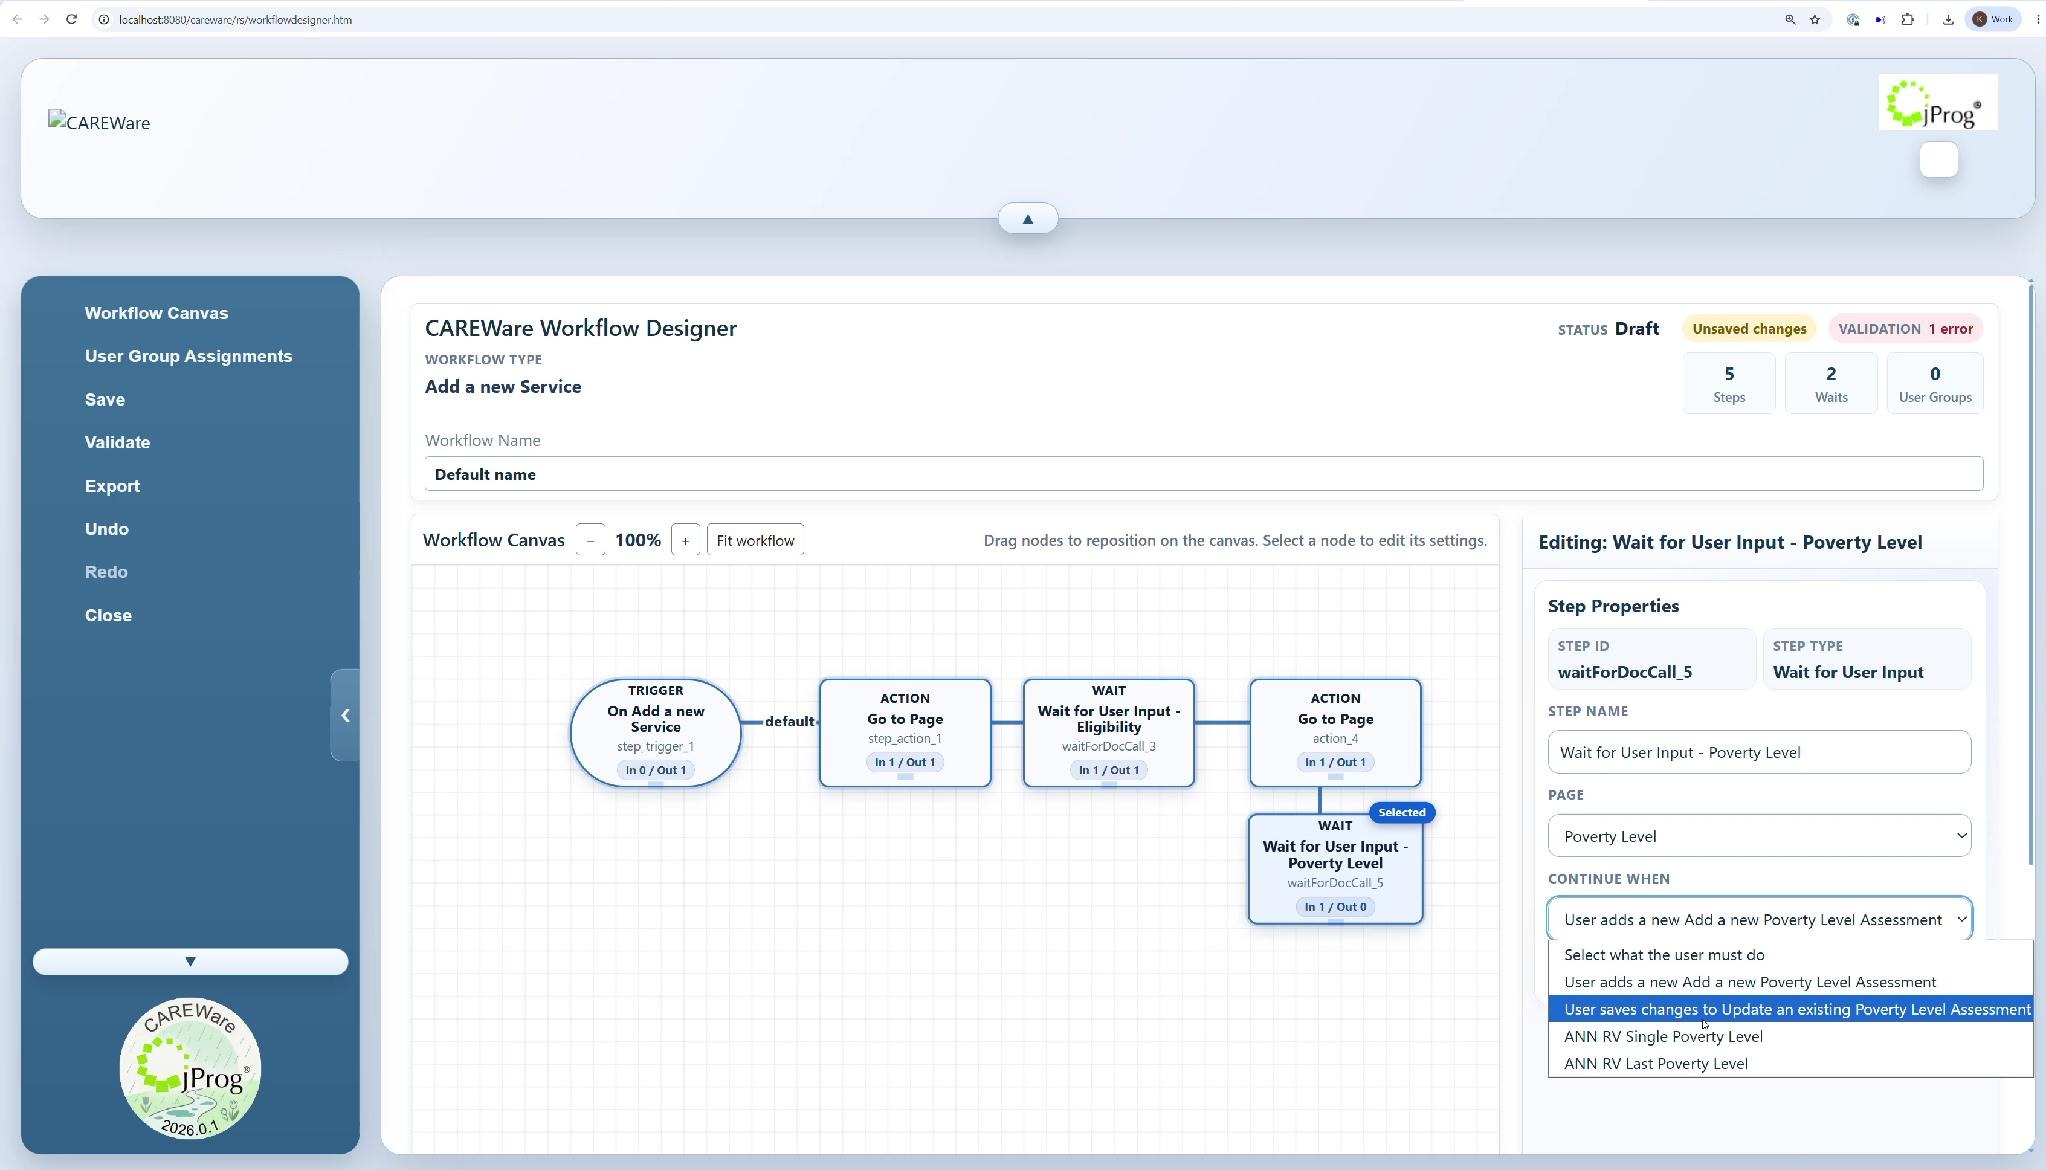
Continue when choices can include multiple event types for the same page. For service, for example, CAREWare shows add-new, update-existing, and report/lookup-related options. It may be appropriate to have a user enter multiple services before continuing to the next step after service entry or completing the workflow.
Reusable configuration patterns
|
|
|
|
|
|
|
|
|
|
|
|
|
|
|
|
|
|
|
|
|
|
|
|
|
|
Messages, confirmations, and save controls
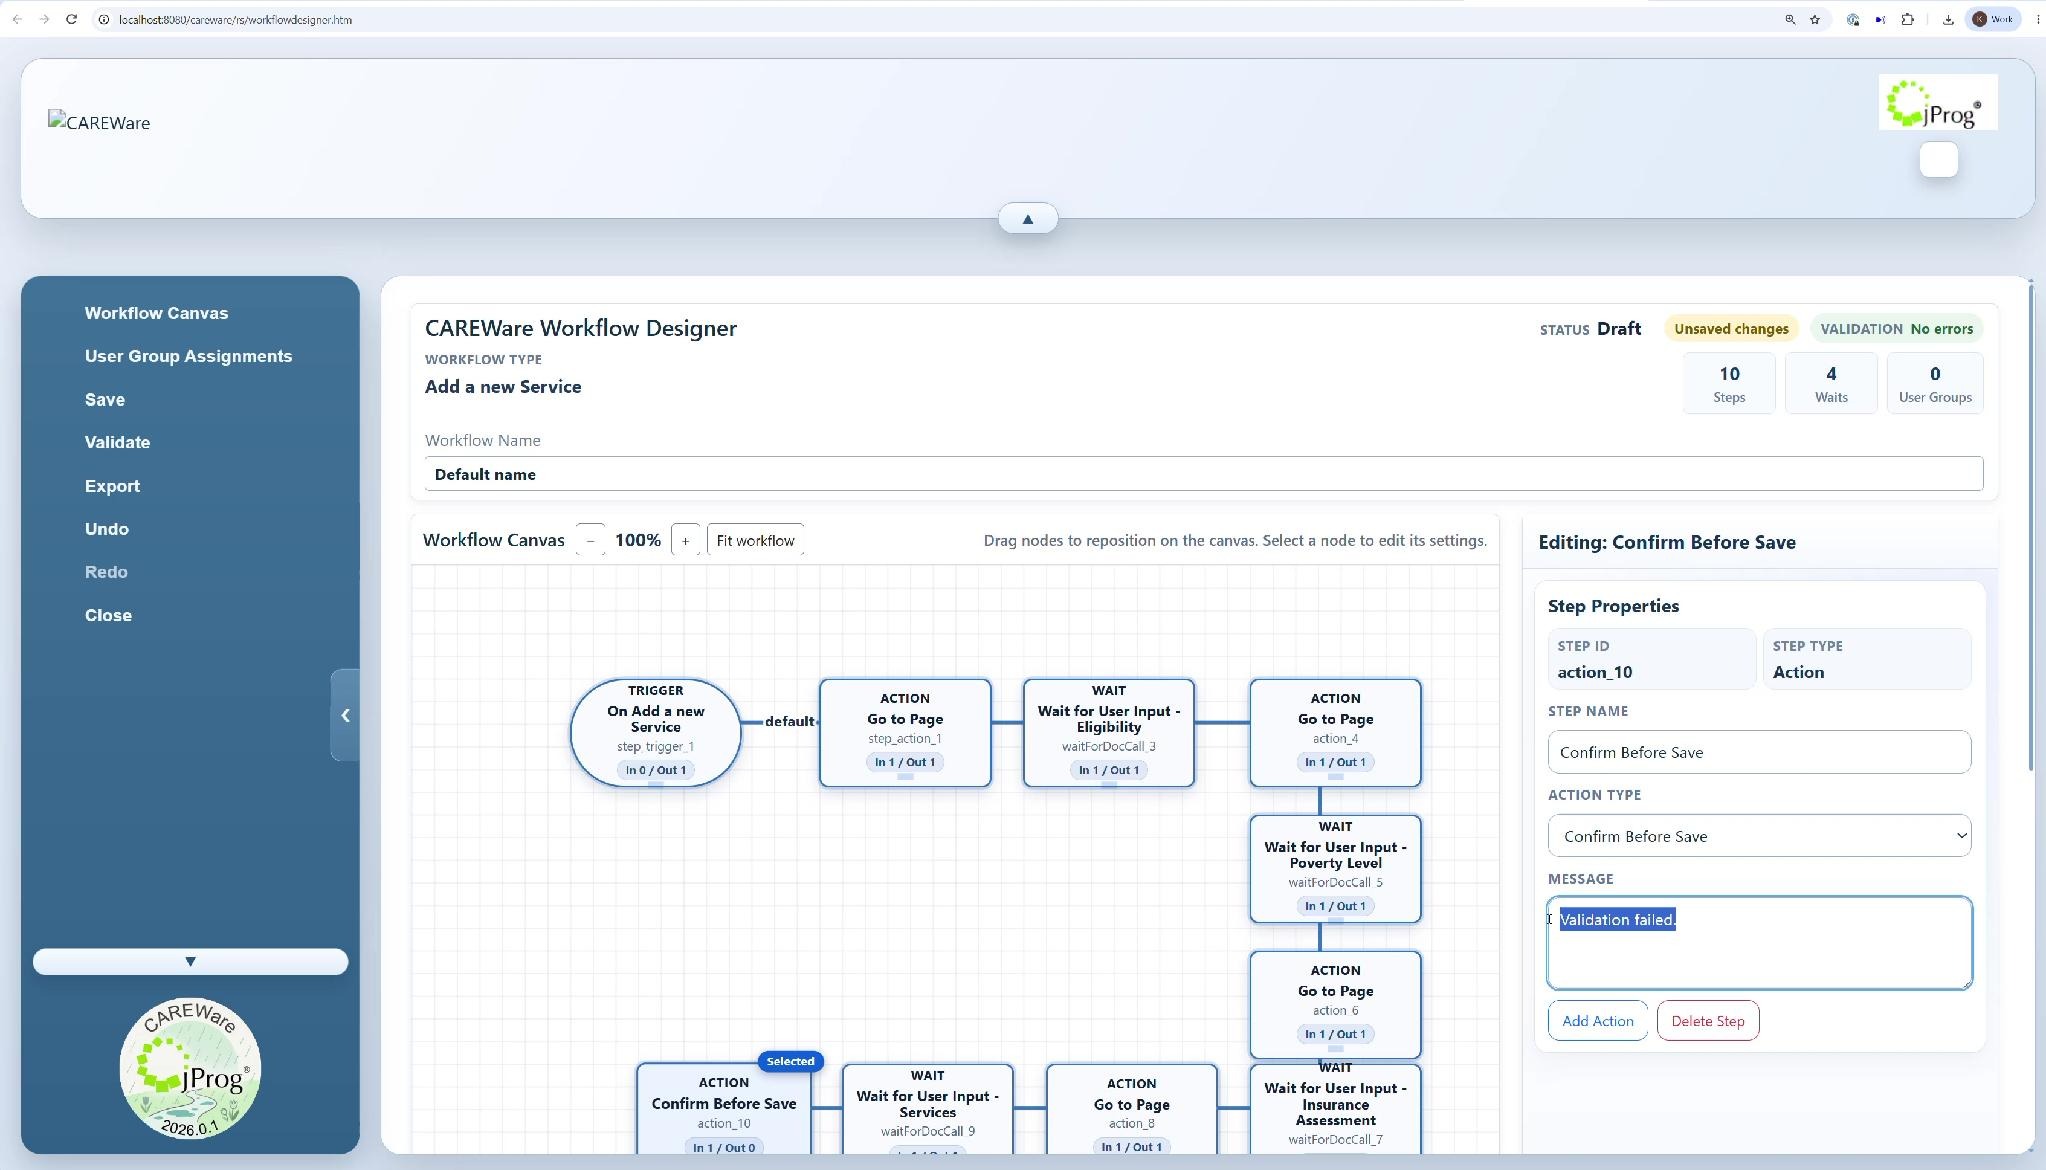
Step 14. Add an Action after the step where the message or save behavior should occur.
Step 15. Choose Show Message, Confirm Before Save, Block Save, or Send Message to User as appropriate.
Step 16. Enter concise message text that tells the user exactly what happened or what to do next.
|
|
Save, validate, assign, and publish
Step 17. Click Save after major edits.
Step 18. Click Validate. Correct every reported error and validate again until No errors displays.
Step 19. Open User Group Assignments. Select only the group(s) that should use or test the workflow, then save.
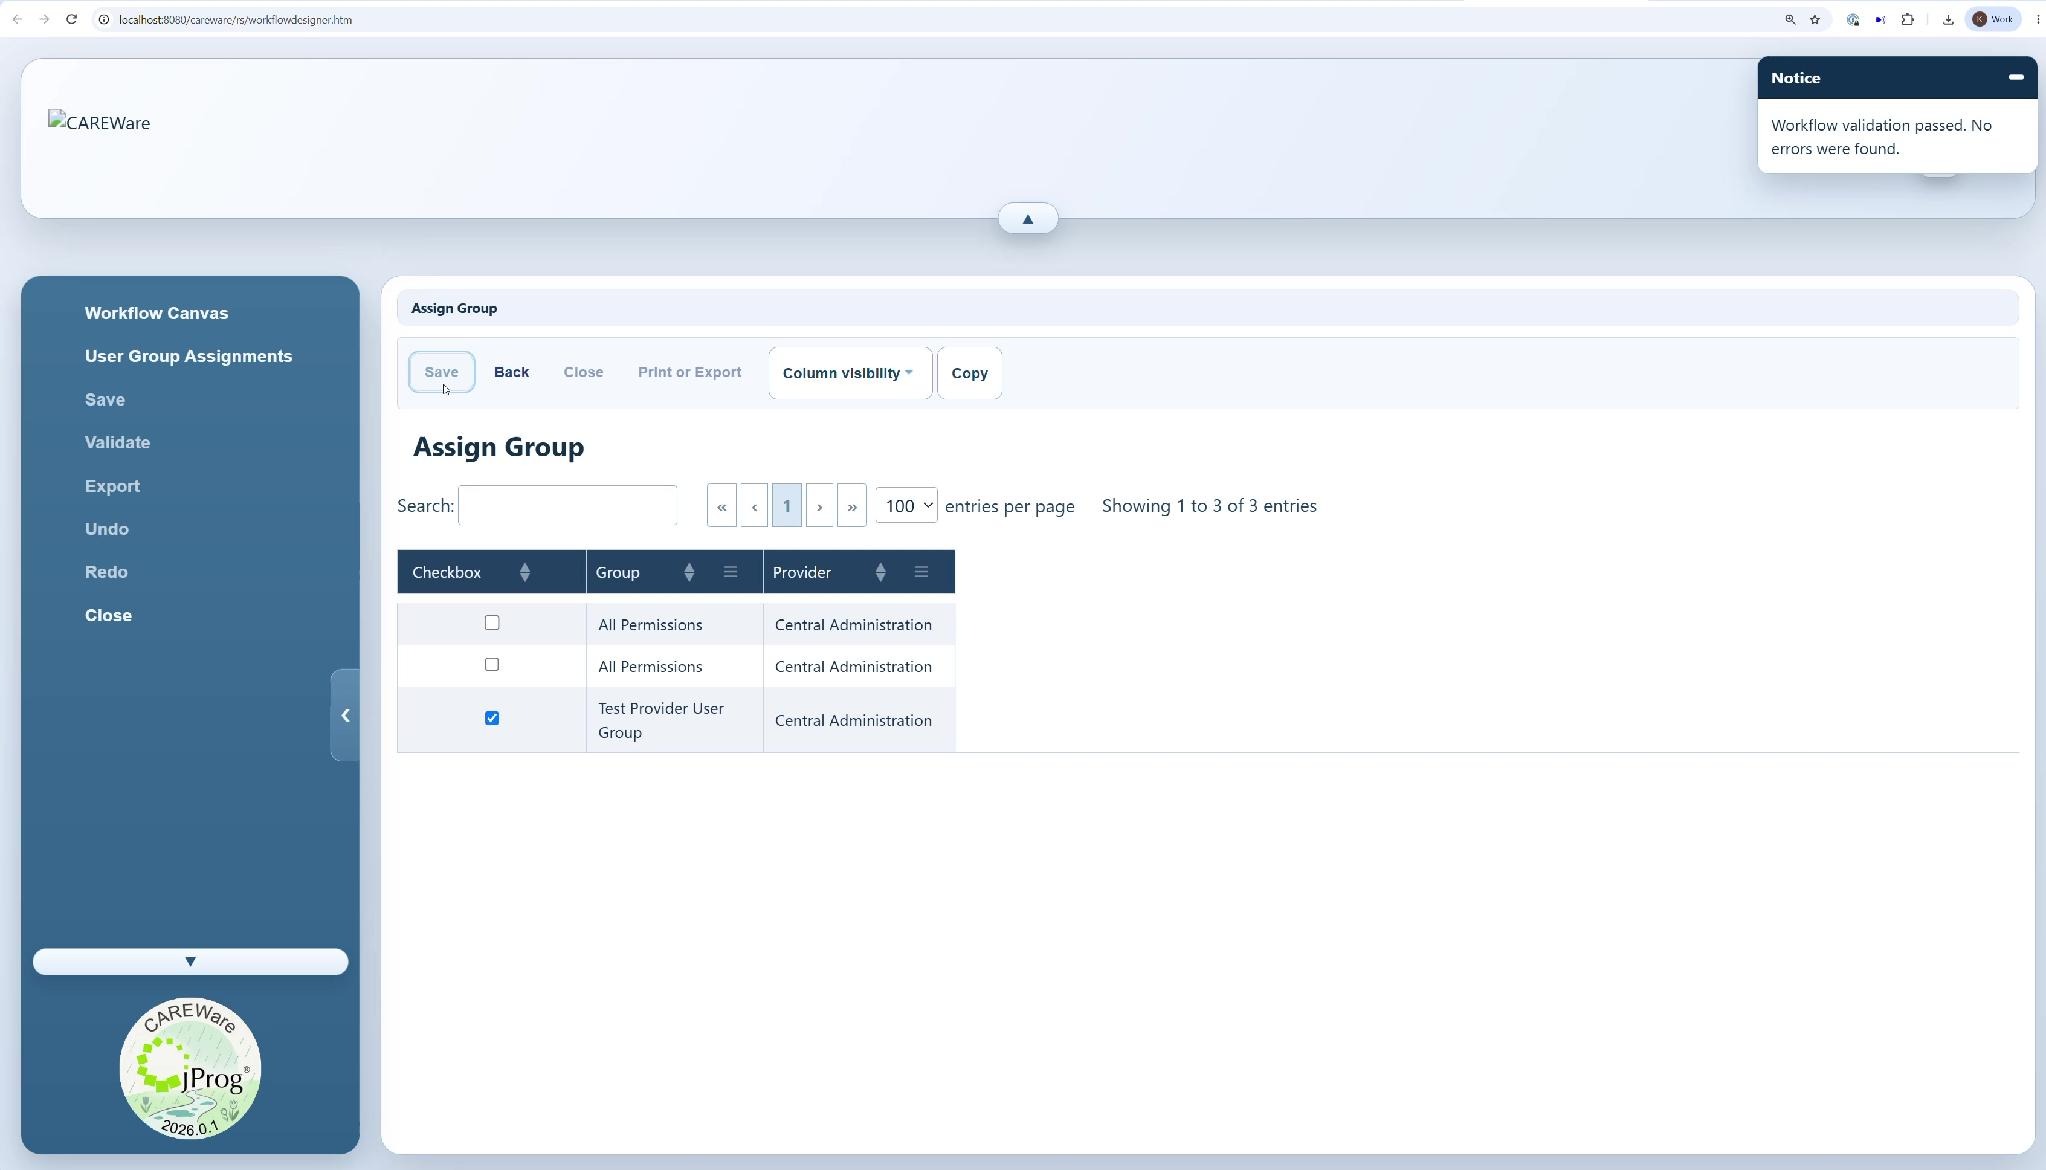
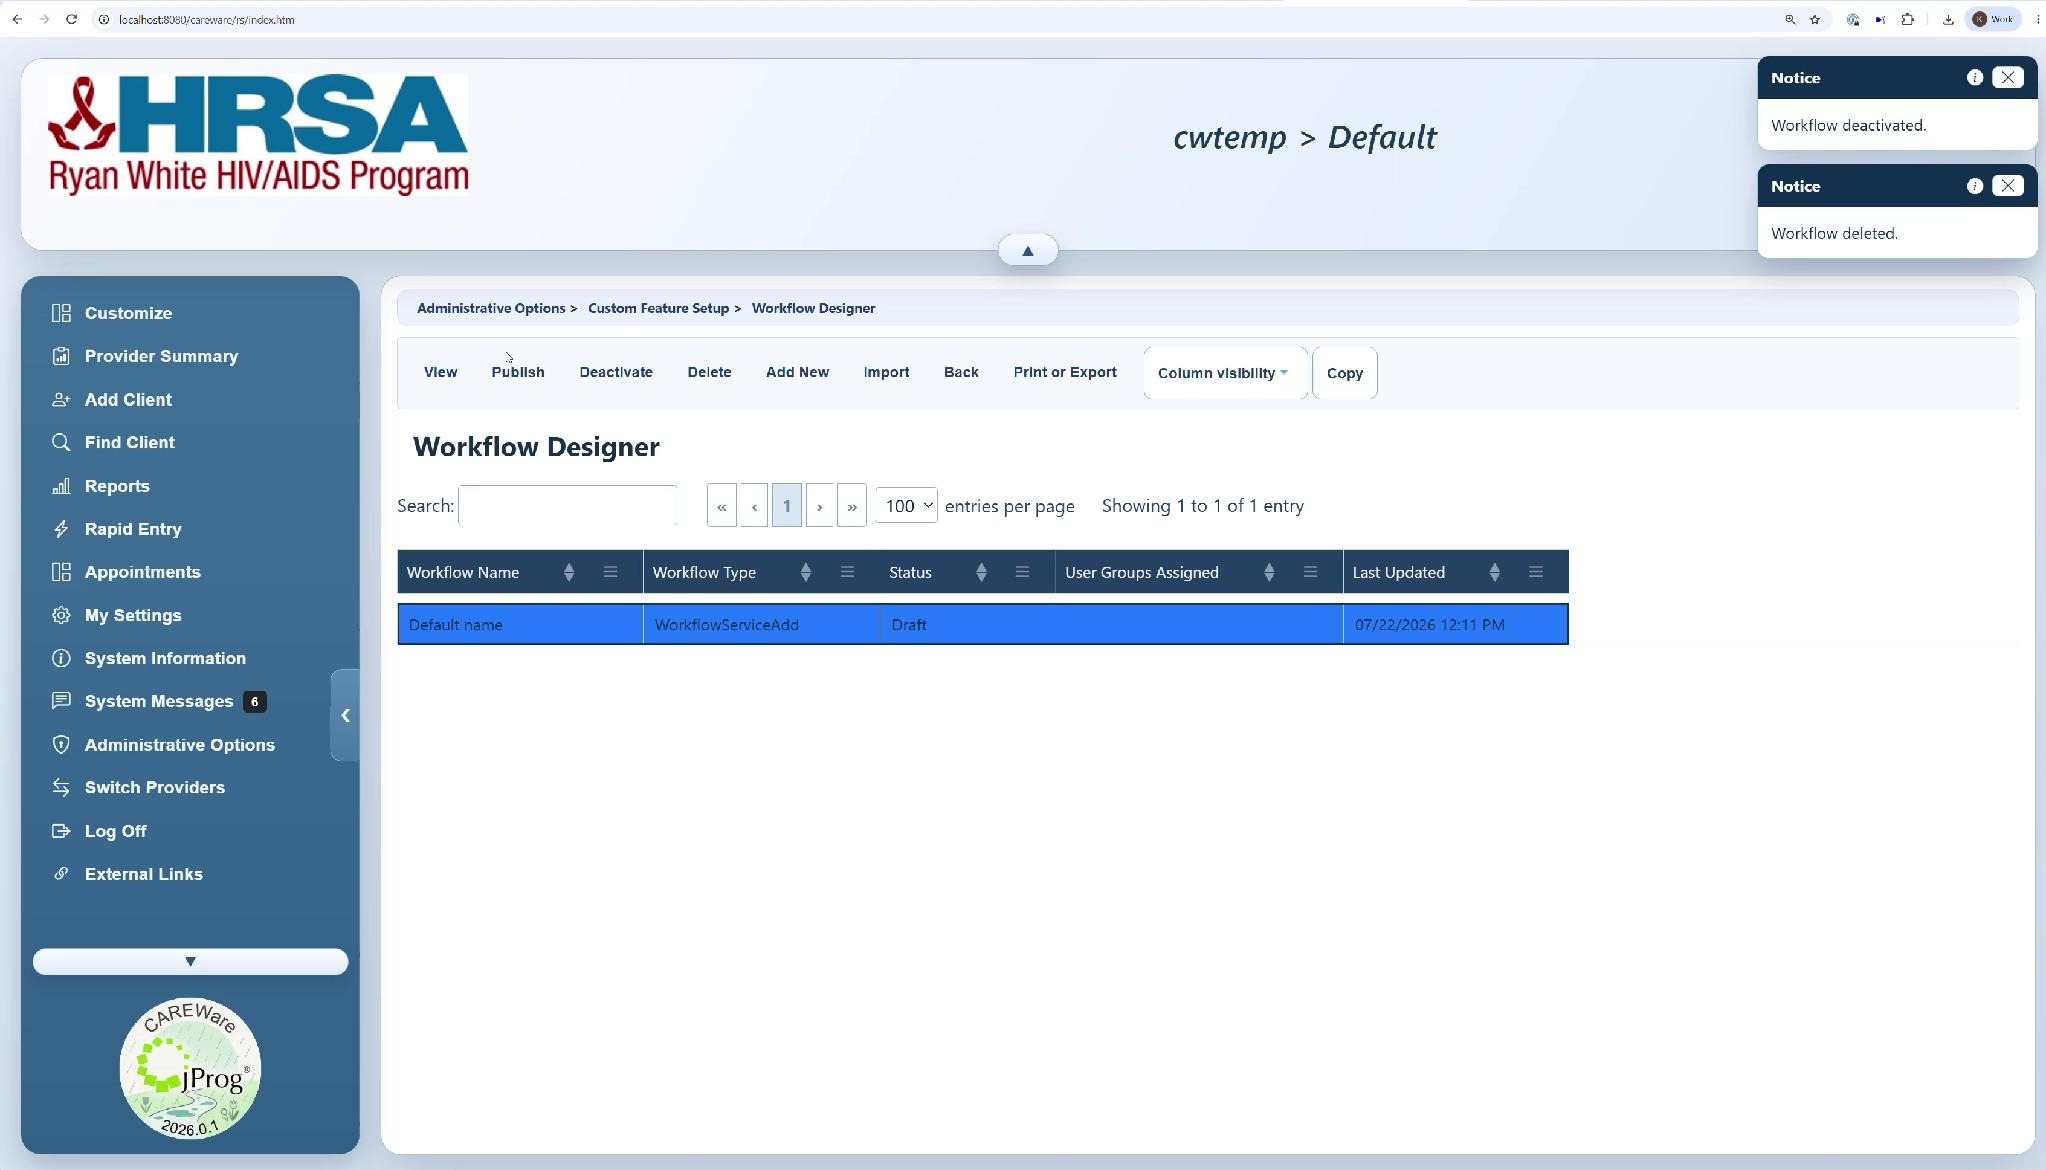
Step 20. Click Close to return to the Workflow Designer list.
Step 21. Select the workflow and click Publish when validation and testing are complete.
Step 22. Confirm the workflow status is Active.
.
|
|
Workflow list and maintenance configurations
|
|
|
|
|
|
|
|
|
|
|
|
|
|
|
|
|
|
|
|
|
|
|
|
|
|
Adds selected text from lists to a clip board to be pasted in a document |
|
|
|
|
|
|
|
|
|
Testing checklist and troubleshooting
Before publication
• Trigger the workflow with a test record and confirm it starts in the intended provider.
• Complete every Go to Page + Wait sequence using the same user group that will run the workflow.
• Test an interrupted session: close/log out, reopen the same provider and client record, and confirm the pending workflow resumes as intended.
• Verify any message, confirmation, block-save behavior, branch, or prefilled value.
• Validate again after every structural change and confirm No errors before publishing.
Common questions
|
|
|
|
|
|
|
|
|
|
|
|
|
|
|
|
|
|
RSR and ADR design
From the RSR workflow references
• Plan the page order and the saved-record event before building.
• Use a small test group first.
• Verify that every assigned user can open and save every page in the sequence.
• Use Go to Page + Wait for User Input for Enrollment Status, Eligibility, HIV Status, Services, Insurance Assessment, Poverty Level, Annual Screening, and labs (If OAHS are delivered) when building new-client RSR workflows.
• Verify actual RSR inclusion with RSR Client Report/Viewer and RSR Validation tools rather than the workflow completion message.
From the ADR workflow references
• Use the same Go to Page + Wait pattern for ADAP Enrollment History, HIV Status, Drug Services/Payments, and Services.
• Choose the save event that reflects the record the user must complete.
• Confirm enrollment status, reporting-year dates, qualifying records, and ADR validation results after workflow completion.
|
|
Related CAREWare guides and references
The following CAREWare Knowledge Base guides are relevant to workflow setup, permissions, client creation, service entry, and report validation. These links were reviewed on 8/10/2026.
|
|
|
|
|
|
|
|
|
|
|
|
|
|
|
|
|
|
|
|
|
|
|
|
|
|
|
|
|
|
|
|
|
|
|
|
Importing and exporting workflows
Workflows are provider specific, so they are created in the provider and accessible by staff that are assigned to that provider’s user groups. To share workflows with other providers, the workflow can be exported and then imported to the provider.
|
|
Exporting a Workflow
Step 1. Open the workflow to be exported
Step 2. Click Export
The file now appears in the download folder selected in the browser settings. The file is a .json file.
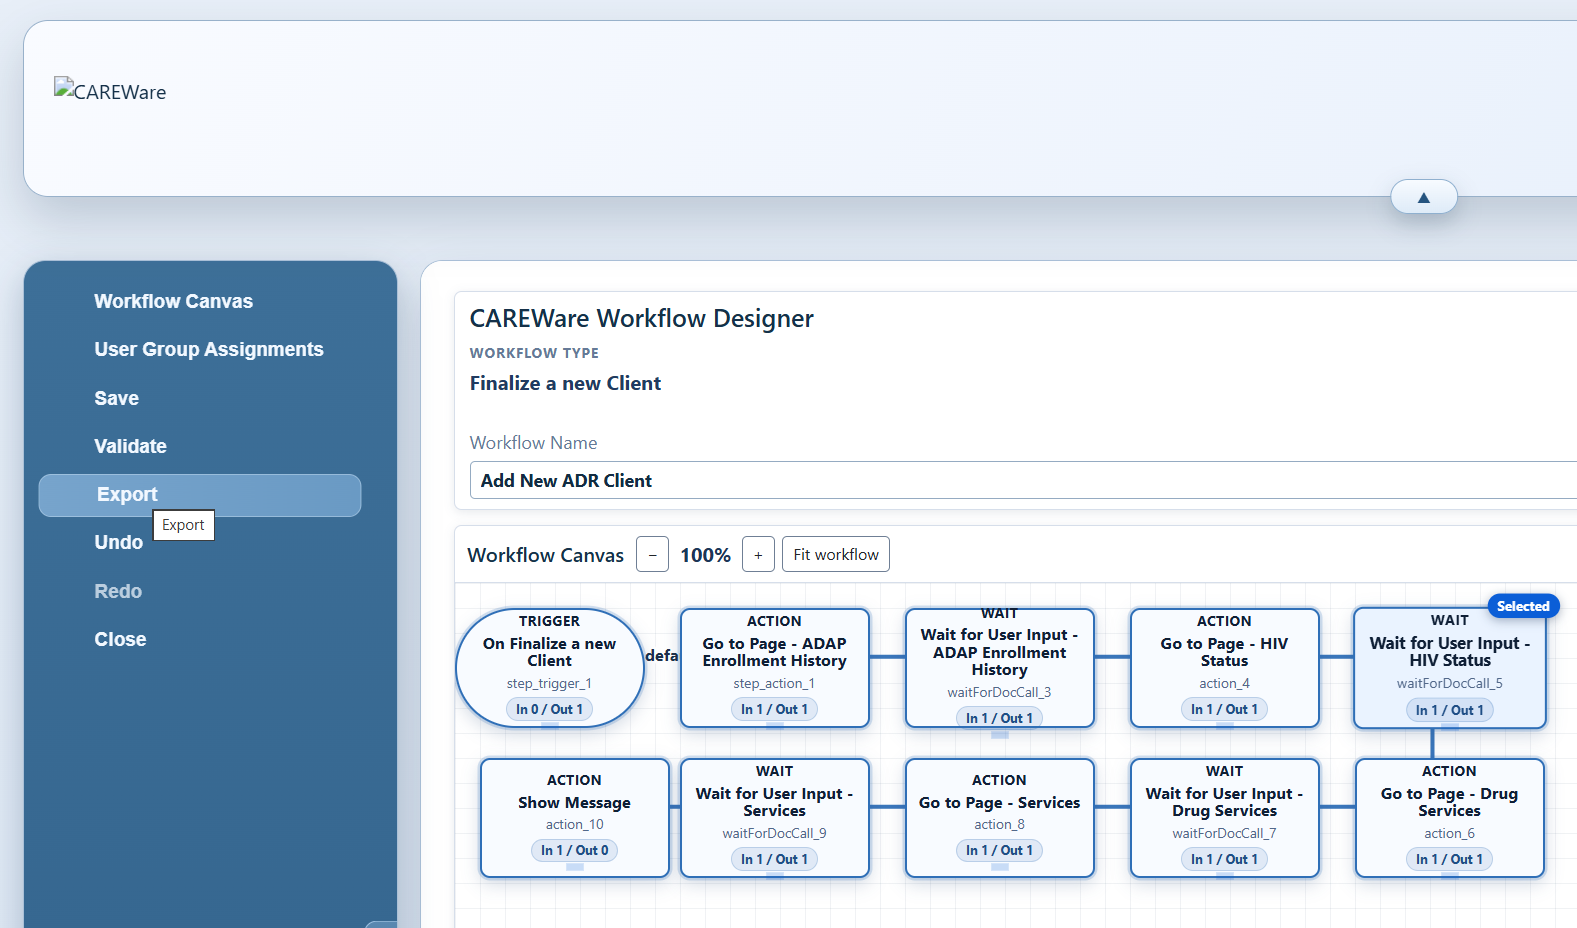
Exporting a Workflow
Step 1. In the Workflow Designer list, click the workflow to be exported to highlight it.
Step 2. Click Import.
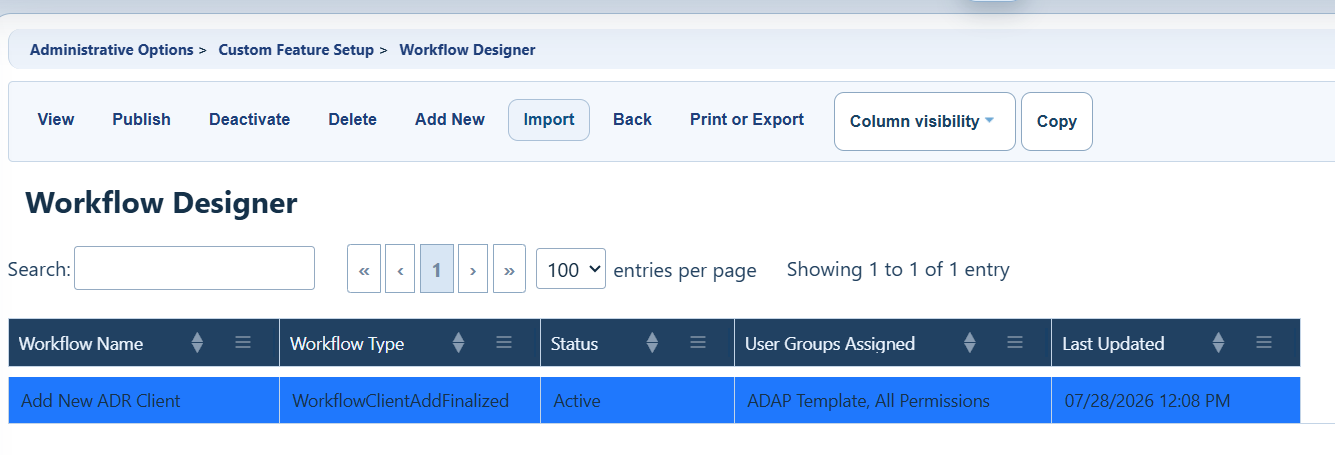
Step 3. Select the .json file for the workflow that should be imported.
Step 4. Click Open
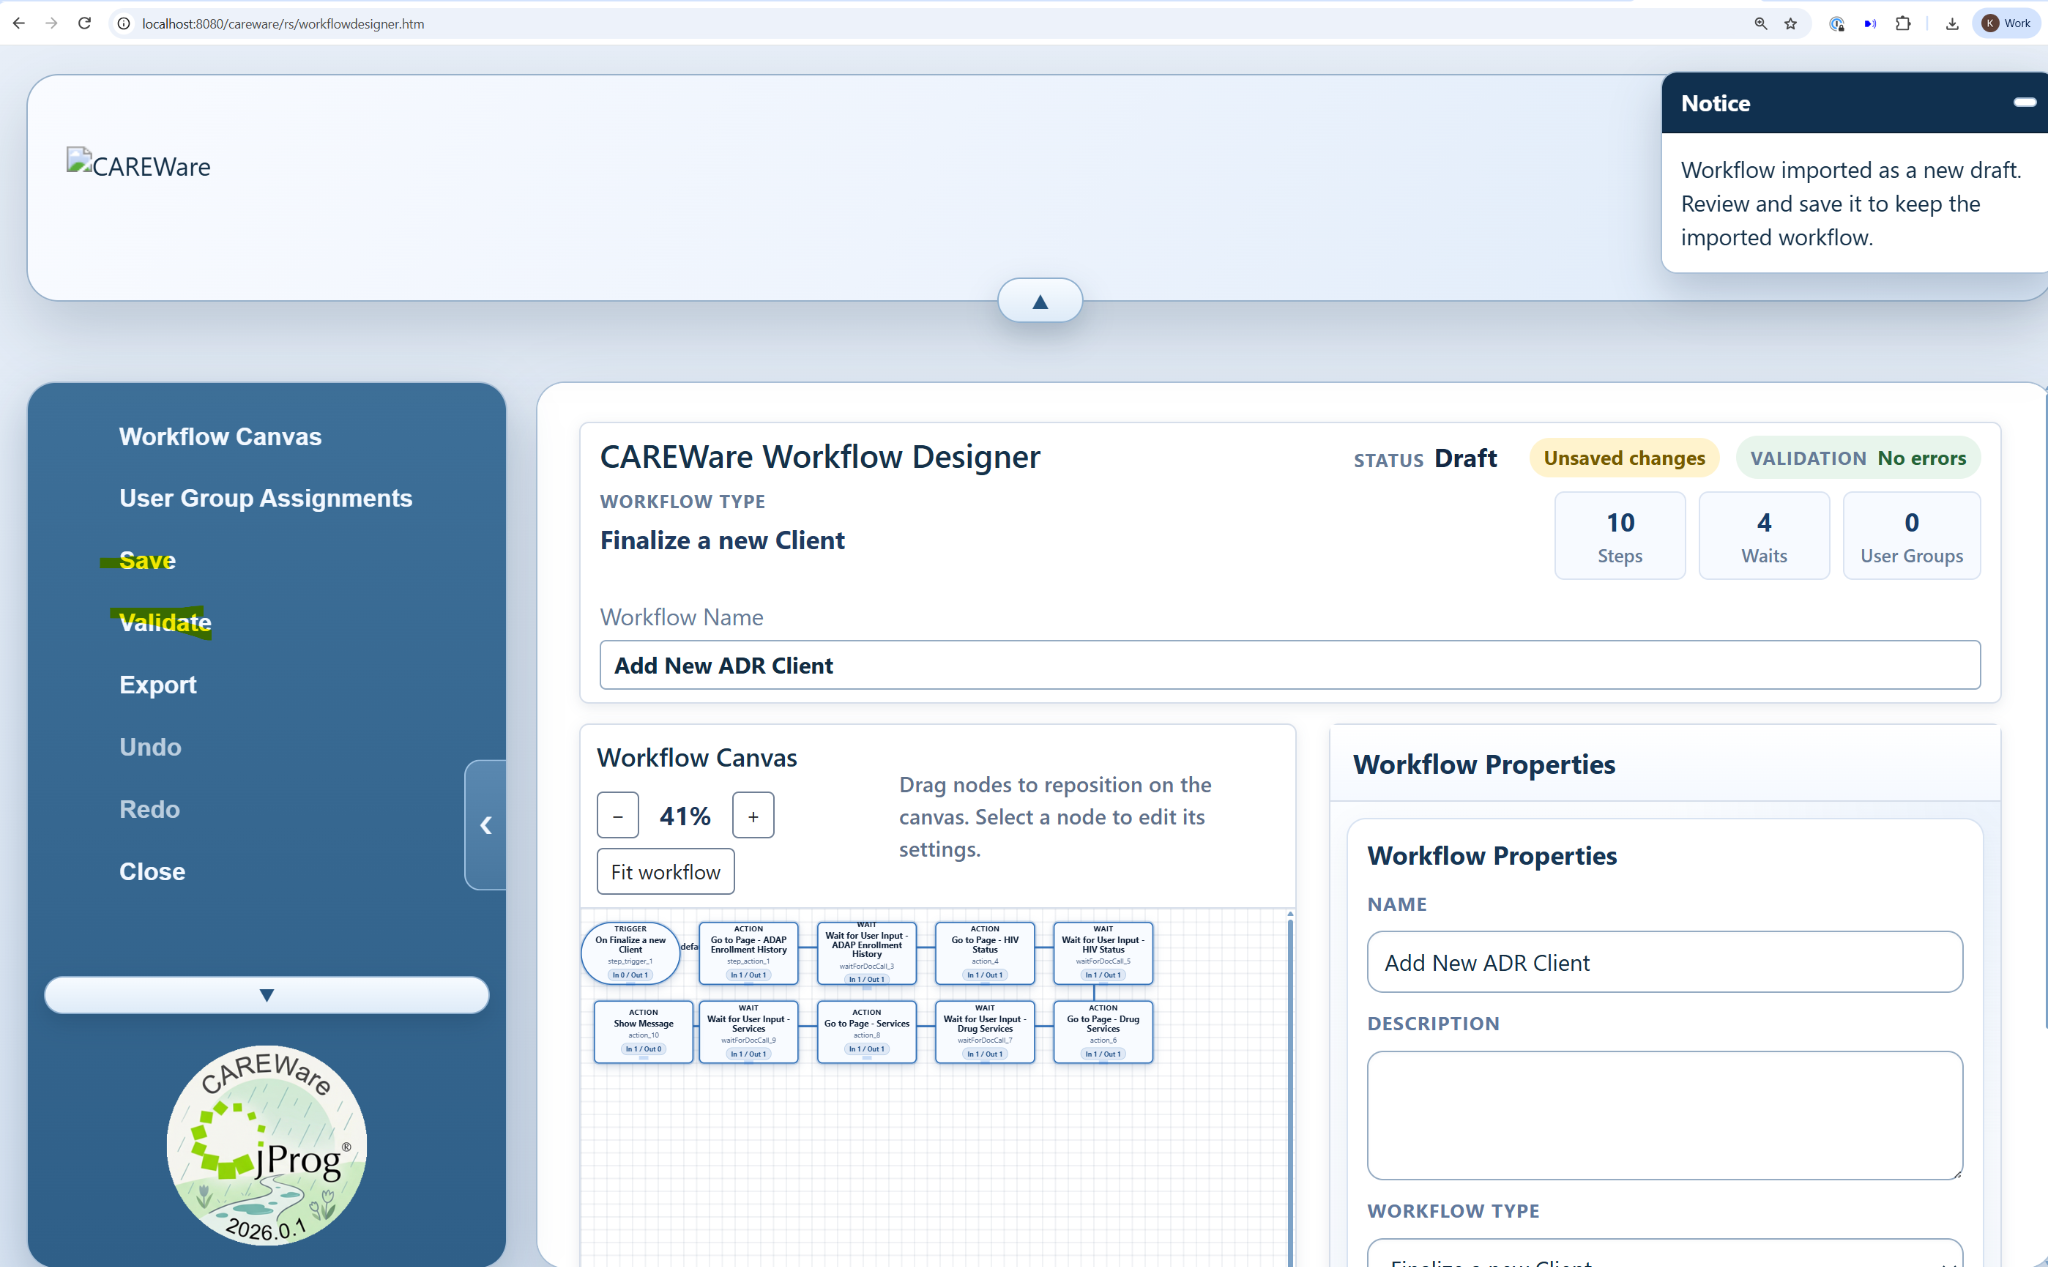
Step 5. Once the workflow is imported, click Validate to ensure the workflow works for this provider.
Step 6. Click Save to complete the import.
Examples of workflows that can be downloaded for use in CAREWare
RSR
|
|
|
|
|
|
|
|
|
|
|
|
|
|
|
ADR
|
|
|
|
|
|
|
|
|
|
|
|
|
|
|


